
|
Do it yourself
| |||
| ||||


How to replace the windshield washer pump and sprayer on the Smart 450.
Model: Smart Smart
450
- Years 1998-2007
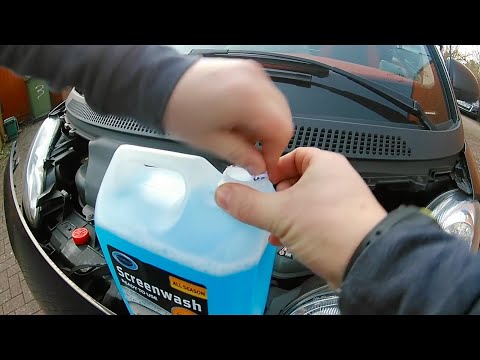
If, when you activate the windshield washer, the sprayer no longer sends enough water to clean the glass properly, and the spray does not reach halfway up the glass, it means there is a problem with the pump. The pump is located behind the windshield washer fluid reservoir and is press-fitted, so you just need to remove it firmly and it will come off without any issues. Of course, it depends on the car you are working on: if it is a Smart car, there will be very little space to work with. If the plastic does not hold well, you will need to wrap it with a few layers of heat shrink tubing, because if it doesn't hold, changing the pump would have been pointless: it still won't spray properly. When you change the pump, some fluid will come out of the reservoir: you need to collect and dispose of it at an authorized center, you cannot simply pour it down the sink. You can find the pump on Amazon for 13.48 euros, including delivery charges. We reinstall it by pushing it into its housing. Now we also clean the sprayers with a brass wire, inserting it deeply. Then we blow into it to check if air comes out or not. Job done.
Posted on 2 September 2023 by ScegliAuto
Video tutorial
Related tutorials
Smart
(1998-2007 /
450)
Let's see how to top up the water (or rather, the appropriate liquid) in the windshield washer of a Smart car. On the front of the vehicle, there are…

Smart
(1998-2007 /
450)
To be able to top up the washer fluid on the Smart 450, loosen the bolt that secures the grille immediately under the windshield on the left side. On…
Smart
(2007-2015 /
451)
How to replace or top up the washer fluid on a Smart Fortwo? Let's see how easy it is to top up the liquid. We unlock the plastic levers at the botto…
Other guides you may be interested in
|
Frequently Asked QuestionsFuse Replacement on Fiat Grande Punto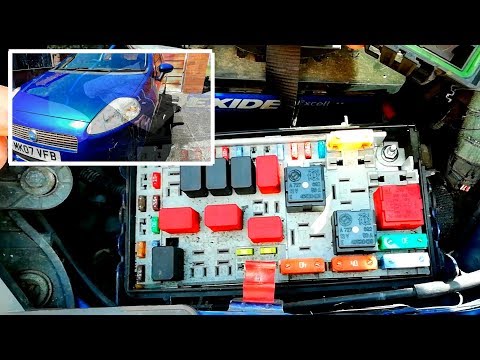
Fuse replacement on the Fiat Grande Punto? Let's see where they are located. Open the door and enter the cabin, then open the glove compartment in the front dashboard (you will find the fuses there). You will also find fuses in the engine compartment: open the front bonnet and remove the cover near the battery using a plastic lever. Use pliers to disconnect the damaged fuses located in the compartment. Once this is done, insert the new fuses into the designated slots in the compartment. Close the fuse inspection box with the cover. by ScegliAuto More videos
|
|
For advertising on this site Write to info@scegliauto.com
ScegliAuto is not responsible for any inaccuracy of the data in the lists. To report any inaccuracy or your business (if you own the business in question), please write to info@scegliauto.com
Number of seconds to generate the page: 0.050
(c) ScegliAuto 2026 - info@scegliauto.com - Privacy policy VAT number: IT01247470535 |