
|
Do it yourself
| |||
| ||||


Replacing the Rear Light with Tuning Model
Model: Volkswagen Golf
Golf 5, MK 5, Golf V
- Years:
2003, 2004, 2005, 2006, 2007, 2008
Video tutorial
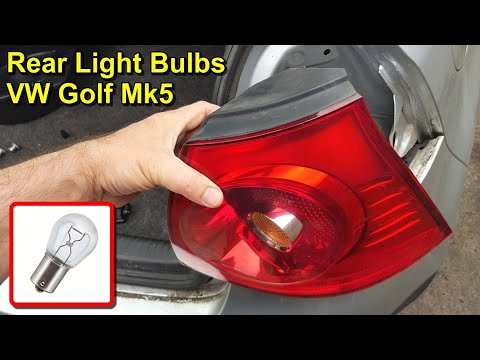
To replace the rear light located on the tailgate, access it from the boot: on the internal plastic covering, directly opposite the light, there is a plastic cap: once removed, simply disconnect the bulb holder, unscrew the two metal nuts securing the light, remove it and fit the new one. For the light located on the bodywork, lift the carpet, disconnect the power connector of the bulb holder, unscrew the two plastic nuts and remove the original light; then transfer the bulb holder from the original light to the new one and reassemble it.
Updated on 6 February 2026 by ScegliAuto
Related tutorials
Volkswagen Golf
(2012-2019 /
MK 7, Golf 7, Golf VII)
Replacing the rear light bulb in the Volkswagen Golf 7 is necessary to continue driving the vehicle safely. Start by opening the boot; on this model …
Volkswagen Golf
(2008-2012 /
Golf 6, MK 6, 5K1, Golf VI)
The tools needed for this replacement are simple plastic spatulas to detach the various light fittings. It is important to note that LED bulbs, unlik…
Volkswagen Golf
(2003-2008 /
Golf 5, MK 5, Golf V)
Follow these steps to remove and replace the rear light bulb on a Volkswagen Golf. First, open the boot lid and disconnect the electrical connector l…
Other guides you may be interested in |
How to enter the radio code in the Opel Zafira?
In the Opel Zafira, it may happen that the radio locks and consequently requests the appropriate security code, especially after disconnecting or replacing the battery. The code can be found in the documents provided at purchase or through one of the various online recovery services. Once obtained, enter it by following the procedure shown in this tutorial. First, switch on the instrument panel, then press and hold both the "AS" button and the left knob for about 5 seconds. Next, enter the first digit by repeatedly pressing the "1" button, continue with the next 3 buttons, and save the setting by pressing the "AS" button again. by ScegliAuto More videos
|
|
For advertising on this site Write to info@scegliauto.com
ScegliAuto is not responsible for any inaccuracy of the data in the lists. To report any inaccuracy or your business (if you own the business in question), please write to info@scegliauto.com
Number of seconds to generate the page: 0.029
(c) ScegliAuto 2026 - info@scegliauto.com - Privacy policy VAT number: IT01247470535 |
