
|
Do it yourself
| |||
| ||||



How to unlock the automatic gearbox on the Citroen C4 Picasso?
Model: Citroen C4 Picasso
MK 2
- Years:
2013, 2014, 2015, 2016, 2017, 2018, 2019, 2020, 2021, 2022
Video tutorial
Let's see how to unlock the automatic gearbox on the Citroen C4 Picasso with the AL4 gearbox (also known as AT8); this is a common issue with this model, so it is advisable to follow this procedure whenever the gearbox enters safety mode. You will need a diagnostic scanner to communicate with the gearbox control system: connect it to the OBD port, turn on the ignition, and access maintenance via the scanner. Now comes the most important part, which must be executed precisely: the gear lever must be positioned in "N", then open the bonnet, where you will find a lever on the gearbox that must also be set to "N". This is crucial; otherwise, the procedure will fail. Now confirm the start of the procedure on the scanner, which will guide you through a "position learning" process, asking you to move the gear lever through all positions so that the calculator can record and memorise them; follow the scanner's instructions carefully, and at the end, you will see a message saying "procedure completed". Turn off the car, remove the scanner, wait a moment, and restart the car.
Posted on 28 April 2026 by ScegliAuto
Related tutorials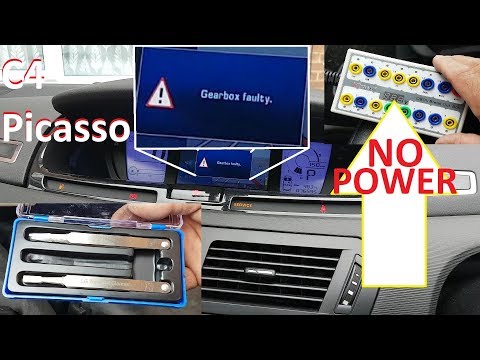
Citroen C4 Picasso
(2006-2013 /
MK 1)
This guide outlines the steps to reset the automatic gearbox on the Citroen C4 Picasso and C4 Grand Picasso. When the onboard computer displays a mal…

Citroen C4 Picasso
(2006-2013 /
MK 1)
Today we will see the instructions that will allow us to reprogram the control unit of the automatic gearbox of the Citroen C4 Picasso. In order to p…

Citroen C4 Picasso
(2006-2013 /
MK 1)
In this guide, we will see the necessary instructions to be able to carry out the learning of the Citroen C4 Grand Picasso's BMP6 automatic transmiss…
Other guides you may be interested in |
How to Remove the Toll Tag Holder from the Car Windscreen
The toll tag holder is usually attached to the car windscreen to ensure that the toll tag functions immediately when passing through barriers. However, if you decide to remove the holder, you should follow this procedure: - Insert the toll tag into the holder; - Pull the holder inwards to detach it from the windscreen; you can use a glass scraper or a stiff plastic card to assist you; After removing the holder, it is essential to remove the adhesive from the windscreen. To remove the adhesive, we recommend using a solvent-based spray that will remove the glue without clouding the area. by ScegliAuto More videos
|
|
For advertising on this site Write to info@scegliauto.com
ScegliAuto is not responsible for any inaccuracy of the data in the lists. To report any inaccuracy or your business (if you own the business in question), please write to info@scegliauto.com
Number of seconds to generate the page: 0.061
(c) ScegliAuto 2026 - info@scegliauto.com - Privacy policy VAT number: IT01247470535 |
