
|
Do it yourself
| |||
| ||||


How to Remove the Timing Belt Cover on the Citroen C8
Model: Citroen C8
MK 1
- Years 2002-2014
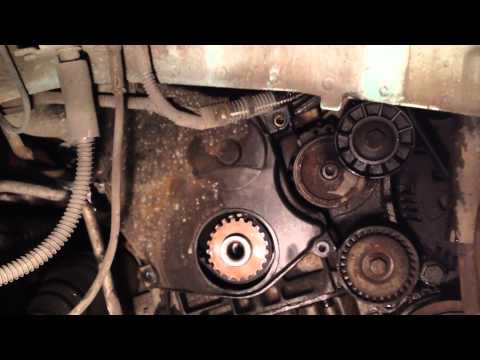
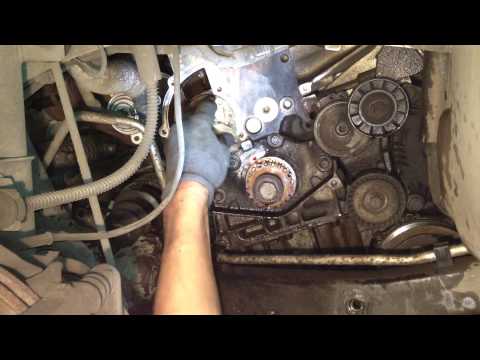
Replacing the timing belt is not typical DIY maintenance as it requires special tools to secure and maintain the timing references. Start by placing a support under the engine since you need to remove the side support and the coolant reservoir to gain access. Remove the auxiliary belt and detach the crankshaft pulley to take off the plastic cover protecting the timing belt. At this point, align the timing references and apply the appropriate tools to prevent movement during disassembly. Finally, loosen the tensioner, remove the timing belt, and replace the water pump before refitting the new belt along with the tensioner and bearing.
Updated on 21 February 2026 by ScegliAuto
This video is currently unavailable
Related tutorials
Citroen C8
(2002-2014 /
MK 1)
Replacing the timing belt requires a basic understanding of general mechanics, as an assembly error could compromise the engine. It is advisable to l…
Citroen C8
(2002-2014 /
MK 1)
Replacing the timing belt is a task that requires good mechanical knowledge, as a mistake could severely compromise engine function; start by removin…
Citroen C8
(2002-2014 /
MK 1)
The water pump is driven by the timing belt, so its replacement requires the removal of the belt itself: align the timing marks before removing the b…
Other guides you may be interested in
|
How to Replace the Engine Air Filter on BMW 3 Series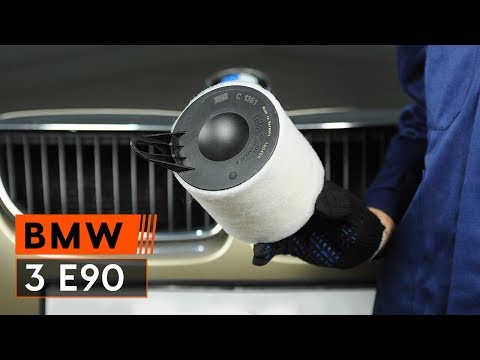
How to replace the engine air filter on BMW 3 Series? Let's see how to proceed in this video: open the car door, pull up the engine hood release lever located at the bottom left of the dashboard, and lift the front hood, securing it. Using a screwdriver, remove the air box assembly (where the air filter is located), disconnect the engine air intake hose and the metal clamp pin. Remove the air filter box from the vehicle body, then extract the worn air filter and insert a new one, ensuring it fits snugly around the walls of the box. Finally, reassemble the air box panel and tighten the screws. Close the front hood when finished. by ScegliAuto More videos
|

|
For advertising on this site Write to info@scegliauto.com
ScegliAuto is not responsible for any inaccuracy of the data in the lists. To report any inaccuracy or your business (if you own the business in question), please write to info@scegliauto.com
Number of seconds to generate the page: 0.078
(c) ScegliAuto 2026 - info@scegliauto.com - Privacy policy VAT number: IT01247470535 |