
|
Do it yourself
| |||
| ||||


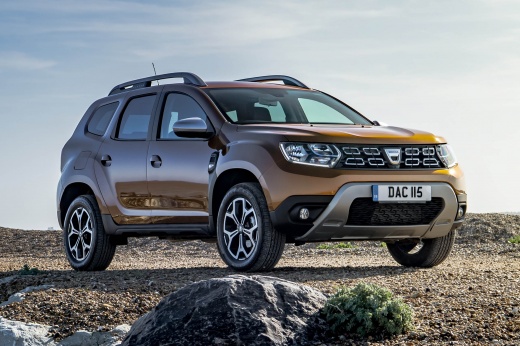
How to install roof racks on Dacia Duster
Model: Dacia Duster
HM, MK 2
- Years 2017-2024
Remove the roof bars from the packaging and check that all components are present. Installation of the bars: place the roof bars on the roof of your Dacia Duster, aligning them with the fixing points. Use the Allen key included in the package to tighten the clamps and secure the bars in place. Make sure the bars are securely anchored to the roof of the car. Check stability: after mounting the bars, make sure they are stable and well positioned. Ensure that the bars are aligned correctly and that there are no movements or vibrations. Test the bars: if possible, load a light object onto the roof bars to test their load capacity and stability. Close any covers or caps on the ends of the roof bars to protect them and for a cleaner look. If your roof bars have anti-theft locks, make sure to activate them to protect your bars and the items you are carrying.
Posted on 18 December 2024 by ScegliAuto
Video tutorial
Related tutorials
Dacia Duster
(2010-2017 /
HS, MK 1)
In this guide, we will see the main instructions on how to install the roof bars on the Dacia Duster. First, let's assemble our roof bars using the k…

Dacia Duster
(2017-2024 /
HM, MK 2)
To install the roof bars on the Dacia Duster, remove the small covers located on the longitudinal bars, which conceal the designated slots for the ro…

Dacia Duster
(2024-2026 /
P1310)
In this video, we see the ingenious adjustable roof rack of the Dacia Duster MK3: it consists of the roof rails that, when needed, can be transformed…
Other guides you may be interested in
|
How to Open the Bonnet on the Lancia Y
To open the bonnet on this vehicle, follow these simple instructions: first, open the driver's door and locate the lever positioned just below the dashboard, marked with an image of the vehicle with the bonnet open. Pull this lever towards you until you hear a "click" indicating the bonnet is released. Next, exit the cabin and stand in front of the bonnet to disengage the safety catch and complete the opening. To do this, slightly lift the bonnet, locate the yellow lever underneath, and pull it to the left to fully release and open the bonnet. by ScegliAuto More videos
|
|
For advertising on this site Write to info@scegliauto.com
ScegliAuto is not responsible for any inaccuracy of the data in the lists. To report any inaccuracy or your business (if you own the business in question), please write to info@scegliauto.com
Number of seconds to generate the page: 0.365
(c) ScegliAuto 2026 - info@scegliauto.com - Privacy policy VAT number: IT01247470535 |
