
|
Do it yourself
| |||
| ||||


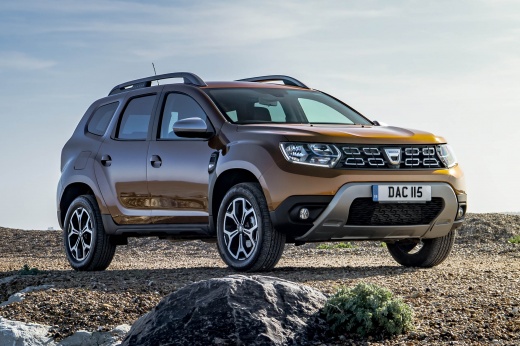
How to create custom skirts for Dacia Duster.
Model: Dacia Duster
HM, MK 2
- Years:
2017, 2018, 2019, 2020, 2021, 2022, 2023, 2024
Video tutorial
What the video proposes is to replace the original side skirts of this Dacia Duster with a customized version made of 3 mm galvanized sheet metal, mechanically fastening them to the body for a robust and professional appearance. First, we need to remove the original side skirts, which are secured with clips and screws, and then thoroughly clean the area of the body where the new side skirts will be attached. We create a template using thick cardboard to shape the sheet metal, which we will have cut and bent by a workshop. We make holes along the lower edge of the side skirt and along the body of the car to position the fastening bolts. Next, we install the cage nuts and, using a grinder, we bevel and round all the edges of the side skirt, perfectly adapting it to the car's original lines: this requires testing and adjustments. We then sand the surfaces and apply a very durable paint, such as Rust-Oleum for truck beds: we can find it on Amazon with the code B0DXVQPL1Q at a price of 7.00 euros + 8.00 euros for shipping. This is a very tough finish that helps to mask small imperfections. Once the paint is completely dry, we position the side skirt on the car and secure it with the bolts.
Posted on 28 November 2025 by ScegliAuto
Related tutorials
Dacia Duster
(2010-2017 /
MK 1, HS)
To easily locate the OBD port inside your Dacia Duster first edition, simply follow the procedure described below. First, enter the car and reach the…
Dacia Duster
(2010-2017 /
MK 1, HS)
Start by sitting in the driver's seat of your Dacia Duster, then start the engine by turning the key in the ignition. Next, using the selection butto…
Dacia Duster
(2010-2017 /
MK 1, HS)
Before you start, sit in the driver's seat of your Dacia Duster. Begin by starting the engine, turning the key in the ignition. Next, press and hold …
Other guides you may be interested in |
How to Remove the Rear Seat of a Hyundai Tucson?
To remove the rear seat of a Hyundai Tucson, follow these steps. Start by moving the front seats to their most forward position to gain space. Next, locate the release lever on the underside of the rear seat, near the floor. Press this lever down while pulling the seat upwards to unlock it from the anchor pins. Once unlocked, tilt the seat upwards and forwards to remove it from its position. Repeat this process for both sides of the rear seat. Be careful of any electrical cables or components that may be connected to the seat during removal. Once the rear seat is removed, the disassembly is complete. by ScegliAuto More videos
|
|
For advertising on this site Write to info@scegliauto.com
ScegliAuto is not responsible for any inaccuracy of the data in the lists. To report any inaccuracy or your business (if you own the business in question), please write to info@scegliauto.com
Number of seconds to generate the page: 0.016
(c) ScegliAuto 2026 - info@scegliauto.com - Privacy policy VAT number: IT01247470535 |
