
|
Do it yourself
| |||
| ||||


Replacing the Interior Light on a Fiat Multipla
Model: Fiat Multipla
MK 1
- Years:
1998, 1999, 2000, 2001, 2002, 2003, 2004, 2005, 2006, 2007, 2008, 2009
Video tutorial
Need to replace the interior light on a Fiat Multipla? Here’s how to remove the unit from the upper panel. Remove the caps covering the securing screws of the light (unscrew the screws). Take off the small lens on the light and unscrew the other screws. Use a flat tool to pry between the light and the headlining, pull the light out from the panel, and disconnect the power connector. Replace the damaged bulb with a new one (same size and voltage). Refit the light in its housing and screw all the screws back in (press the transparent plastic with your hands until it is fully secured).
Updated on 22 March 2026 by ScegliAuto
Related tutorials
…

Fiat Multipla
(1998-2010 /
MK 1)
Today, learn how to remove and replace the rear headlamp bulb on the Fiat Multipla. First, open the boot and start unscrewing the plastic caps locate…
Fiat Multipla
(1998-2010 /
MK 1)
Before starting, open the bonnet of your Fiat Multipla by pulling the designated release handle located at the bottom left of the steering column. Be…
ScegliAuto offers an extensive international collection of automotive tutorials available in 12 languages. Each guide combines instructional videos with original explanations written by experienced human editors, along with information about the car models covered.
Other guides you may be interested in |
Where is the battery located on the Aprilia Scarabeo 250ie scooter?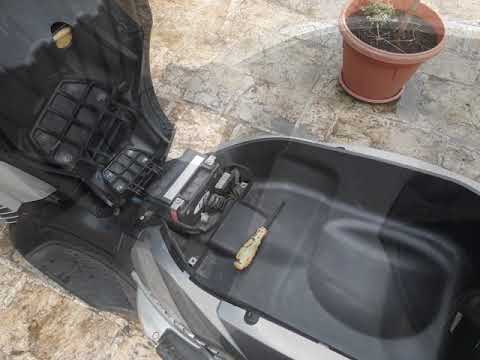
This video shows where the battery is located on the Aprilia Scarabeo 250ie scooter and how to proceed if you need to replace it. As shown, it is located beneath the seat. To access and replace it, first open the seat, then remove the plastic cover by unscrewing the relevant screws with a cross-head screwdriver. Next, disconnect both terminals, starting with the negative, remove the battery from its housing, and install the new replacement following the reverse procedure. by ScegliAuto More videos
|
|
For advertising on this site Write to info@scegliauto.com
ScegliAuto is not responsible for any inaccuracy of the data in the lists. To report any inaccuracy or your business (if you own the business in question), please write to info@scegliauto.com
Number of seconds to generate the page: 0.008
(c) ScegliAuto 2026 - info@scegliauto.com - Privacy policy - About us VAT number: IT01247470535 |
