
|
Do it yourself
| |||
| ||||


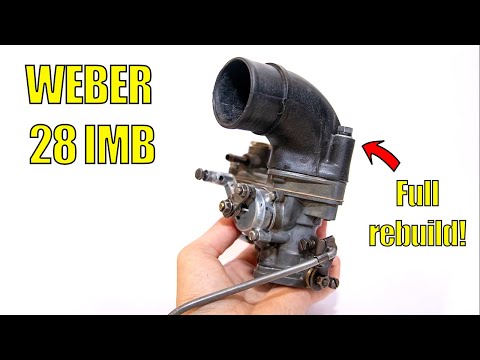
How to Clean the Carburettor and Adjust the Engine Idle
Model: Fiat 500
Epoca
- Years 1957-1975
Good maintenance is essential for an efficient vehicle and to ensure its longevity. In this guide, we will see how to clean an old carburettor and make the necessary adjustments if it has just been replaced.
First, to clean the carburettor, it must be removed. Once free, clean it thoroughly with a specific product or acetone, or you can soak it in petrol or diesel and then brush it carefully. Once cleaned and reassembled, and importantly, having replaced the gaskets, turn it upside down with the float facing up and check that it is 7 mm away from the gasket. If you have just replaced the carburettor, you need to make the correct adjustments before starting the engine. First, loosen the mixture adjustment screw almost completely, count the total turns it takes to close fully, and then unscrew it by an amount equal to half of those turns. Greater precision can be achieved once the engine is running. With the idle screw tightened beyond halfway, start the engine and adjust it, noting that it is advisable to make the adjustment when the engine is warm.
Updated on 1 February 2026 by ScegliAuto
Video tutorial
Related tutorials
Fiat 500
(2007-2024 /
312)
Today's guide will show us the steps that will allow us to adjust the idle speed of the vintage Fiat 500. First of all, let's open the engine hood an…
Fiat 500
(1957-1975 /
Epoca)
In order to clean the carburettor of a vintage Fiat 500, the piece must be completely disassembled, removing it from its housing inside the engine co…

Fiat 500
(1957-1975 /
Epoca)
In this guide, let's find out some important explanations regarding the carburetion of our vintage Fiat 500. In fact, the carburettor is equipped wit…
Other guides you may be interested in
|
How to Remove the CV Boot on Fiat Panda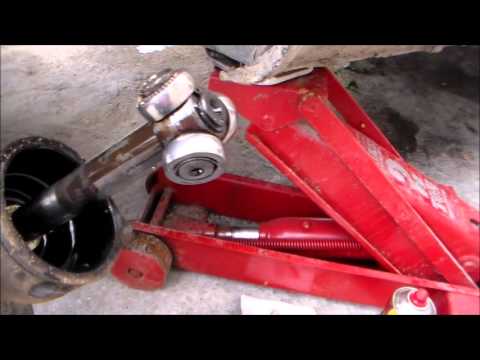
Let’s see how to remove the boot from the joint on a Fiat Panda. After positioning your car on a column lift: raise it to a comfortable height to work on, loosen the wheel nuts (using a socket wrench or air drill) and remove the wheel. Begin unscrewing the brake disc bolts with a socket wrench. Remove the bolts located under the disc and completely detach the wheel hub. Pull the arm around the joint with your hands. Fit the new boot (after removing the old one) onto the constant velocity joint, then start reassembling all the parts in reverse order. by ScegliAuto More videos
|
|
For advertising on this site Write to info@scegliauto.com
ScegliAuto is not responsible for any inaccuracy of the data in the lists. To report any inaccuracy or your business (if you own the business in question), please write to info@scegliauto.com
Number of seconds to generate the page: 0.061
(c) ScegliAuto 2026 - info@scegliauto.com - Privacy policy VAT number: IT01247470535 |