
|
Do it yourself
| |||
| ||||


Fiat Fiorino - Video tutorial
Model: Fiat Fiorino
MK 3
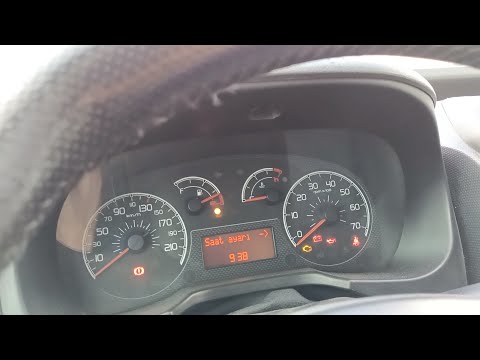
- Years 2007-2024 In this video we can see how to set the date and time on the display of the Fiat Fiorino MK3: we will use the keypad located on the left side of the dashboard, next to the steering wheel. On the outer part of this keypad we find the setting button: press it and enter the menu. Scroll through the various options with the button immediately to the left, which is the one for turning on the lights, until you reach the date and time. The year will start flashing: if we need to correct it, do so with the headlight buttons, which also have up/down arrows to adjust these settings, and scroll horizontally with "set"; then move on to the hour and minutes adjusting in the same way. Confirm with "set" and the operation is complete.
Posted on 7 May 2024 by ScegliAuto
 How to set the date and time on the Fiat Fiorino
Fiat Fiorino (2007-2024 / MK 3) Today's step-by-step instructions will show us how to adjust the date and time of the Fiat Fiorino, as well as the Peugeot Bipper and Citroen Nemo. F  How to set the time on a Fiat Fiorino?
Fiat Fiorino (2007-2024 / MK 3) To set the time on a third generation Fiat Fiorino, first turn on the vehicle's dashboard. Then, select the time using the button on the right-hand l  Setting the clock on a Fiat Fiorino.
Fiat Fiorino (2007-2024 / MK 3) Let's see in today's very short video tutorial all the necessary steps to set the clock on our Fiat Fiorino mk3, a model produced in the year 2015. L Other guides that may interest you
|
Frequently Asked QuestionsHow do I replace the Land Rover Evoque auxiliary battery?
In order to replace the auxiliary battery of the Land Rover Evoque, it is necessary to go inside the passenger compartment and remove the panel which is positioned immediately under the glovebox. Once the screws that secure this panel have been loosened, it will be possible to access the components located in its rear part, including the auxiliary battery. The latter must be disconnected from its cables and the fixing screws must be loosened. The battery can then be replaced with a new one and the panel can be fixed again with its screws. by ScegliAuto More videos
|
|
For advertising on this site Write to info@scegliauto.com
ScegliAuto is not responsible for any inaccuracy of the data in the lists. To report any inaccuracy or your business (if you own the business in question), please write to info@scegliauto.com
Number of seconds to generate the page: 0.095
(c) ScegliAuto 2024 - info@scegliauto.com - Privacy Policy VAT number: IT01247470535 |