
|
Do it yourself
| |||
| ||||


Lexus IS - Video tutorial
Model: Lexus IS
MK 1
- Years 1998-2005 The water pump is driven by the timing belt, therefore it is suggested to carry out this repair only if you have good knowledge of mechanics, as a mistake could seriously damage the engine. Once the radiator has been removed, the timing belt can be easily accessed: then align the timing references and proceed with removing the toothed belt and the auxiliary belt. Then proceed with disassembling the water pump which is right next to the tensioner; apply thread locker to the pulley fixing studs and tighten them using the nut-lock nut technique. Carefully clean the pump seat and proceed with the installation of the new pump by applying the relative gasket and, if necessary, some sealing compound. Complete the assembly by installing the tensioner and then the toothed belt and the auxiliary belt (given the complexity of the operations, it is advisable to replace the belts in any case).
Posted on 27 July 2023 by ScegliAuto
 Car water pump replacement
Lexus IS (2013-2023 / MK 3) The guide shows us how to change the water pump in our car. Once the position of the piece has been identified, we lift the car from the pump side, o 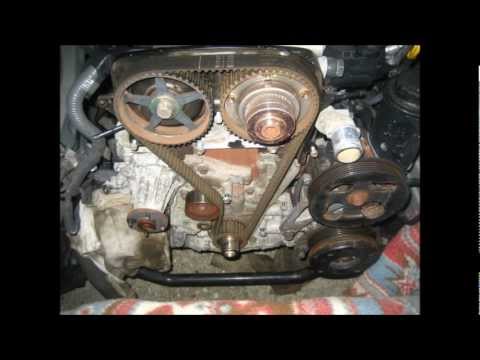 Timing belt replacement
Lexus IS (1998-2005 / MK 1) The replacement of the timing belt requires a certain knowledge of mechanics, since it is essential to keep the timing references during the disassem
Preparation of polishing waxLexus IS (2005-2013 / MK 2) If you want to keep the bodywork always shiny and sparkling, it must be taken care of periodically by treating it with suitable polishing and at the Other guides that may interest you
|
How do you open the fuel flap of the Volkswagen Golf 5?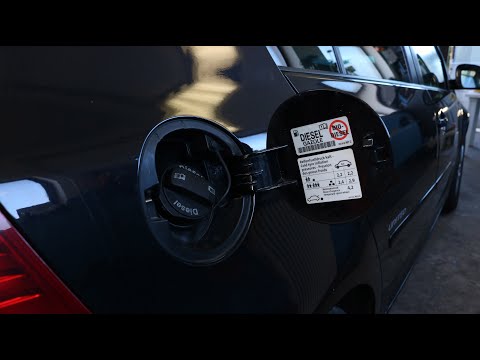
In order to open the fuel flap of the Volkswagen Golf 5, you need to press the appropriate button inside the passenger compartment, which is located in the rear part of the glove box on the driver's door. By pressing the button, the flap will unlock and it will then be possible to open it manually. Once the flap has been opened, the fuel tank access cap must be unscrewed. To close everything again, it will be sufficient to screw the tank cap again; subsequently, the flap must also be closed, pressing it so that it fits thanks to its locking mechanism. by ScegliAuto More videos
|
|
For advertising on this site Write to info@scegliauto.com
ScegliAuto is not responsible for any inaccuracy of the data in the lists. To report any inaccuracy or your business (if you own the business in question), please write to info@scegliauto.com
Number of seconds to generate the page: 0.074
(c) ScegliAuto 2024 - info@scegliauto.com - Privacy Policy VAT number: IT01247470535 |