
|
Do it yourself
| |||
| ||||


How to replace the rear headlight bulb of a Nissan Altima?
Model: Nissan Altima
L33
- Years:
2013, 2014, 2015, 2016, 2017, 2018
Video tutorial
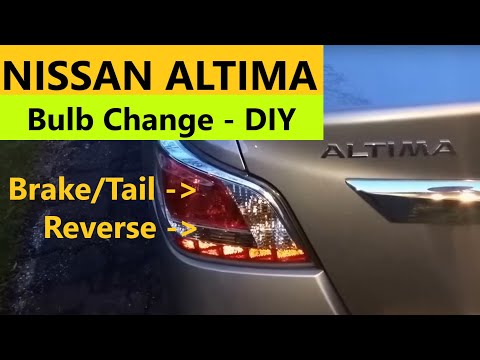
To replace the rear headlight bulb of a Nissan Altima, start by opening the trunk to access the interior of the optical group. Once opened, locate the inner lining covering the headlight area; this lining should be carefully removed to avoid damage, usually by releasing the clips or unscrewing the screws holding it in place. With the lining removed, you will have access to the back of the headlight where the bulb holders are located. Gently grasp the bulb holder of the burned-out bulb and rotate it counterclockwise to remove it. Then extract the bulb from the bulb holder, pushing lightly and rotating it, if necessary, until it disengages. Take the new bulb, being careful not to touch the glass with your fingers to avoid leaving residues that could damage it. Insert it into the bulb holder, making sure it is securely in place, then return the bulb holder to its original position and rotate it clockwise to lock it. Finally, put the inner lining of the trunk back in place and close the trunk.
Posted on 26 May 2025 by ScegliAuto
Related tutorials
Nissan Altima
(2018-2026 /
L34)
If the rear headlight bulb on your Nissan Altima (latest model) has suddenly stopped working and you want to learn how to replace it quickly and corr…
Nissan Altima
(2013-2018 /
L33)
To replace the rear headlight bulb on a Nissan Altima, open the trunk to access the cargo area. On the side corresponding to the headlight with the b…

Nissan Altima
(2018-2026 /
L34)
If one of the rear turn signals (or both) on your 2020 Nissan Altima is not working, you need to replace the bulb to avoid any legal or safety issues…
Other guides you may be interested in
|
How to reset the Service light on a 2019 Jeep Renegade?
The Service light, depicted as a yellow spanner, illuminates as scheduled to remind the driver that it is time for scheduled maintenance. This means that the set mileage has been reached, or the expected time has passed. The procedure involves turning on the instrument cluster, pressing the accelerator three times, and then turning off the ignition. After this, keep the brake pressed, turn the ignition back on, and then turn it off again. Upon the next ignition, you will notice that the light has been reset. by ScegliAuto More videos
|
|
For advertising on this site Write to info@scegliauto.com
ScegliAuto is not responsible for any inaccuracy of the data in the lists. To report any inaccuracy or your business (if you own the business in question), please write to info@scegliauto.com
Number of seconds to generate the page: 0.157
(c) ScegliAuto 2026 - info@scegliauto.com - Privacy policy VAT number: IT01247470535 |
