
|
Do it yourself
| |||
| ||||


Nissan X Trail - Timing belt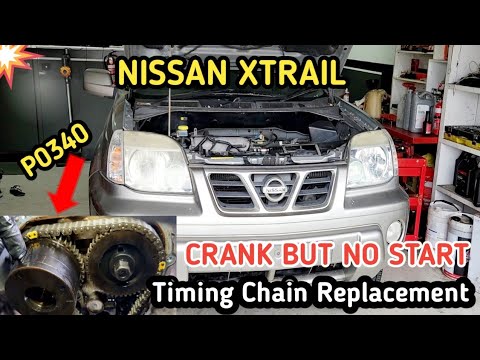 Nissan X Trail (2001-2006 / T30, MK 1)
How do you replace the timing chain on the Nissan X-Trail? In order to replace the timing chain, you must first loosen the screws that fix the valve cover and those that fix the right front wheel, so that both …read all… Posted on 8 June 2023 by ScegliAuto 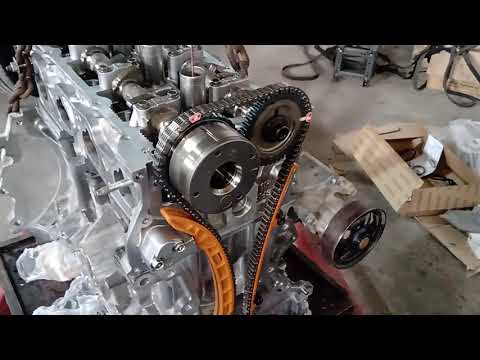 Nissan X Trail (2007-2014 / MK 2, T31)
When to change the timing chain of the Nissan X-Trail? Let's find out in this short guide the instructions that will allow us to disassemble and replace the Nissan X-Trail timing chain; in general, the distribution …read all… Posted on 21 April 2024 by ScegliAuto 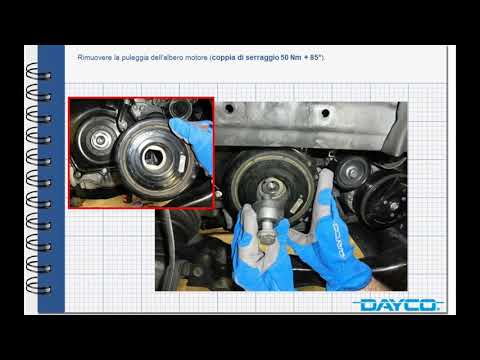 Nissan X Trail (2007-2014 / MK 2, T31)
When to replace the Nissan X-trail 2.0 dCi timing chain The distribution of this Nissan model is of the chain type rather than the belt type: for this type of distribution there is no real maintenance plan as in the …read all… Posted on 16 November 2023 by ScegliAuto Airbags (1) Loudspeaker (1) Shock absorbers (2) Car stereo (2) Battery (2) Spark plugs (1) Glow plugs (1) Key (5) Timing belt (3) -board computer (2) Checks and maintenance (13) Dashboard (1) Tail light (5) Air filter (4) Cabin air filter (4) Petrol filter (1) Diesel filter (3) Rear light bulb (1) Front bumper (1) Brake pads (2) Fuel pump (2) Instrument cluster (4) Wheel (2) Fuse box (17) Seat (1) Outside rearview mirror (2) Windscreen wipers (1) Steering rods (1) EGR valve (1) Interior blower (2) |
How to replace the battery in the Honda Forza 300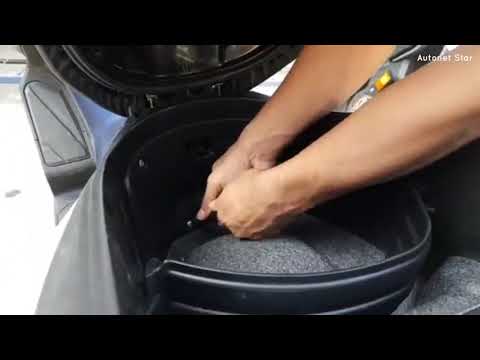
In today's video you will see how to locate the service battery in the Honda midsize scooter, the Forza 300. First park the scooter on the central stand and leave it off for half an hour. Now open the compartment under the saddle with the appropriate command and identify the flap inside it. We proceed with its disassembly by unscrewing the fixing screws and then remove the battery, disconnecting the connectors (first the negative pole and then the positive, as always). If necessary, replace it with a new unit and proceed with the reassembly of the piece. Operation completed. by ScegliAuto More videos
|
|
For advertising on this site Write to info@scegliauto.com
ScegliAuto is not responsible for any inaccuracy of the data in the lists. To report any inaccuracy or your business (if you own the business in question), please write to info@scegliauto.com
Number of seconds to generate the page: 0.011
(c) ScegliAuto 2024 - info@scegliauto.com - Privacy Policy VAT number: IT01247470535 |