
|
Do it yourself
| |||
| ||||


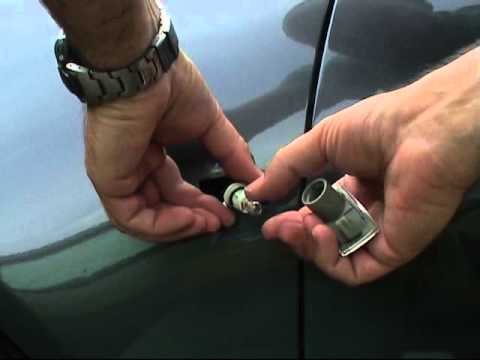
Replacement indicator bulb on Opel Insigna
Model: Vauxhall Insigna
Insigna A, MK 1
- Years 2008-2017 Turn off the car, open the hood and put on the special support rod. We give you some good news right away: to replace the bulb relative to the car's turn signal, it is not necessary to remove the entire headlight. It will be sufficient to remove the small rear cover by simply unscrewing it with your hands. By pulling it out, the arrow bulb will come out with it as well. Slightly unscrew the same until it is removed and insert (and screw) the new one. Put the bulb back in its seat correctly and check that it works correctly. As you can see it is a very simple operation, good job!
Posted on 1 January 2024 by ScegliAuto
 How to replace the side indicator bulb of the Opel Insignia.
Vauxhall Insigna (2008-2017 / Insigna A, MK 1) The steps outlined in this guide will show us how to disassemble and replace the side indicator bulb of the Opel Insignia. First, let's move to the s 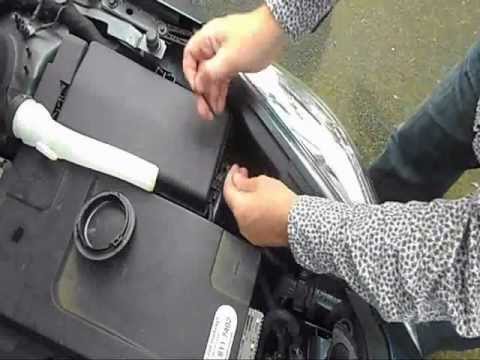 Replacement of a headlight bulb
Vauxhall Insigna (2008-2017 / Insigna A, MK 1) This video shows how to replace the left headlight bulb of an Opel Insigna. After opening the bonnet, remove the wiper fluid pipette. This way you wi  How to remove the Opel Insigna headlight bulb
Vauxhall Insigna (2008-2017 / Insigna A, MK 1) How to remove the headlight bulb? Let's see how the headlight bulb of an Opel Insigna is removed. We lift the bonnet, find the inspection cap of the Other guides that may interest you
|
How to deactivate the safe lock on a Volkswagen Golf.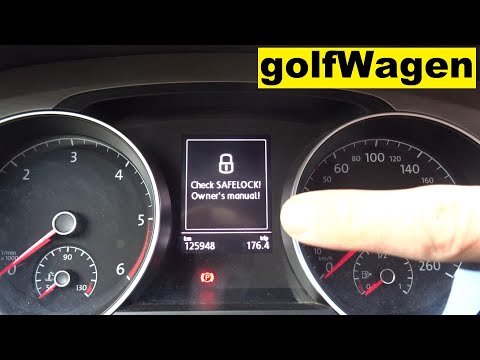
The safe lock is indeed an anti-theft system that prevents thieves from accessing the car. This device locks the doors, both externally and internally, when the driver activates the central locking remote control after leaving the vehicle. To permanently disable it, it is necessary to use a diagnostic program such as VCDS that we will connect to the vehicle through the ODBII port. Then wait for the connection and recognition of the control unit and then select the blocks present and locate the safe lock to disable it. And the job will be completed. by ScegliAuto More videos
|
|
For advertising on this site Write to info@scegliauto.com
ScegliAuto is not responsible for any inaccuracy of the data in the lists. To report any inaccuracy or your business (if you own the business in question), please write to info@scegliauto.com
Number of seconds to generate the page: 0.057
(c) ScegliAuto 2024 - info@scegliauto.com - Privacy Policy VAT number: IT01247470535 |