
|
Do it yourself
| |||
| ||||


Removing and Replacing the Wastegate Valve on an Opel Mokka
Model: Vauxhall Mokka
Mokka A
- Years 2012-2019
In this video, see how to install the wastegate valve on an Opel Mokka. The wastegate valve is the maximum pressure valve used to control the operating conditions of the turbine driven by exhaust gases, which is located after the exhaust manifolds, unlike the blow-off valve (pressure limiter). First, remove the three screws shown in the video to take off the heat shield. Next, remove the two screws and the retaining clip (with care) to take it off quite easily; do this after disconnecting the inlet pipe. You can find this component on eBay with the code 234937193737 for £160.00, including shipping. Position it, tighten the two bolts, and refit the clip; reconnect the outlet pipe, and the job is done.
Updated on 21 September 2026 by ScegliAuto
Video tutorial
Related tutorials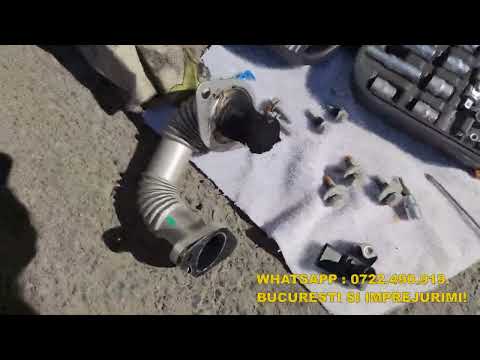
Vauxhall Mokka
(2012-2019 /
Mokka A)
To replace the EGR valve on the Opel Mokka, open the bonnet to access the components in the engine bay. At the rear, you will find the EGR valve conn…

Vauxhall Mokka
(2012-2019 /
Mokka A)
If you decide to replace the EGR valve on the Opel/Vauxhall Mokka A, open the bonnet and remove the plastic engine cover, then remove the coolant res…

Vauxhall Mokka
(2012-2019 /
Mokka A)
It will be possible to replace the EGR valve of the Opel Corsa by opening the hood so that you can access the components in the engine compartment: h…
Other guides you may be interested in
|
How to Bleed the Clutch on a Renault Clio?
To bleed the clutch on a Renault Clio, open the bonnet to access the components located in the engine bay: here, you will need to undo the screws that secure the battery in its housing, the intake manifold, and the coolant reservoir. This will allow you to locate the pipe through which the brake fluid flows: by inserting the other end of the pipe into a container, you can press the clutch pedal to expel all the fluid until it fills the container. by ScegliAuto More videos
|
|
For advertising on this site Write to info@scegliauto.com
ScegliAuto is not responsible for any inaccuracy of the data in the lists. To report any inaccuracy or your business (if you own the business in question), please write to info@scegliauto.com
Number of seconds to generate the page: 0.533
(c) ScegliAuto 2026 - info@scegliauto.com - Privacy policy VAT number: IT01247470535 |
