
|
Do it yourself
| |||
| ||||


Renault Twingo - Video tutorial
Model: Renault Twingo
Twingo 1
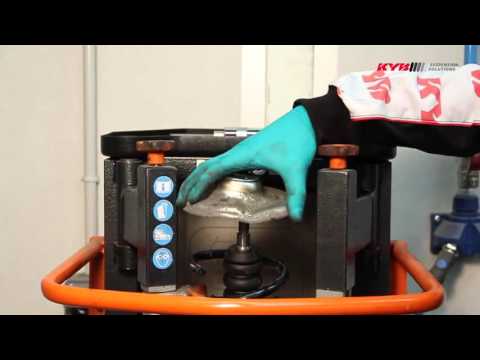
- Years 1993-2007 First of all, put the car on the bridge and raise it to a comfortable height to work on it. Remove the front wheel corresponding to the shock absorber to be replaced. Spray some lubricant on the bolts to be unscrewed. Remove, after having unscrewed the bolts that secure them to the shock absorber, the arm and the brake cables. Now unscrew the two bolts that secure the shock absorber to the wheel. Place a hydraulic jack under the wheel to de-energize the shock absorber. Remove the shock absorber from its housing in the wheel. Open the hood of the engine compartment and, in correspondence with the position of the shock absorber, locate and unscrew the bolt that fixes the head. Remove the shock absorber. Using a suitable tool, tension the shock absorber spring and remove it. Fit the new shock absorber using the same tool. At this point, mount the new shock absorber in its position in the car following the same operations seen before but with the opposite procedure. Refit the wheel and lower the car via the bridge. The maintenance operation that is performed in the images is carried out on a Renault Twingo.
Posted on 17 September 2023 by ScegliAuto
 Replacement of front shock absorbers
Renault Twingo (2007-2014 / Twingo 2) To replace the front shock absorbers it is first of all necessary to have the appropriate clamps to crush the spring; before lifting the car, remove 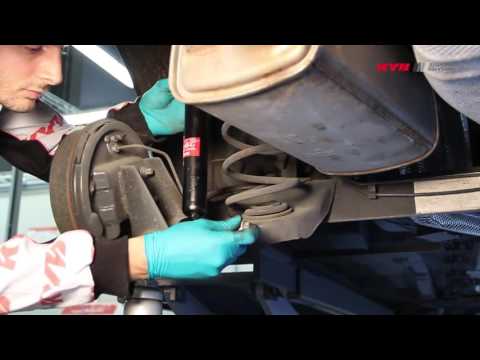 Replacement rear shock absorbers
Renault Twingo (2007-2014 / Twingo 2) The replacement of the rear damper is very simple to carry out since the suspension spring is not coaxial to the damper but is applied directly to th  How to open the front hood of the Renault Twingo
Renault Twingo (2007-2014 / Twingo 2) How to open the front hood of the Renault Twingo for maintenance and topping up? Let's see in this video how to proceed. We open plastic grids placed Other guides that may interest you
|
Frequently Asked QuestionsDisassembly of the gear knob on the Lancia Ypsilon 2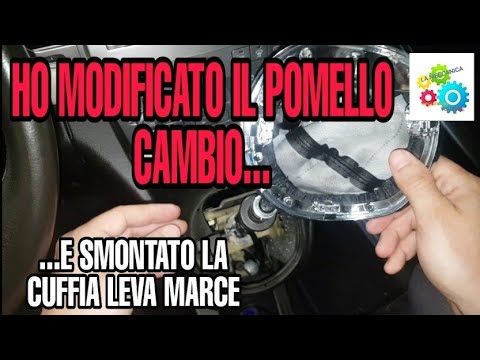
Today we will see, in this video tutorial, how to remove and replace the gear knob on the second series Lancia Ypsilon, but also on the Lancia Musa, in simple and quick steps. We get inside the car and start by removing the old gear knob; to do this, just unscrew it anticlockwise, as shown in the video. At this point we also remove the gearshift gaiter, in order to replace, if necessary, it too; we just have to fix the new headset and insert the new gear knob, screwing it correctly and without creating play on the gear lever! by ScegliAuto More videos
|
|
For advertising on this site Write to info@scegliauto.com
ScegliAuto is not responsible for any inaccuracy of the data in the lists. To report any inaccuracy or your business (if you own the business in question), please write to info@scegliauto.com
Number of seconds to generate the page: 0.057
(c) ScegliAuto 2024 - info@scegliauto.com - Privacy Policy VAT number: IT01247470535 |