
|
Do it yourself
| |||
| ||||


Instructions for Removing the CIM Module
Model: Saab 9 3
MK 2
- Years 2002-2014
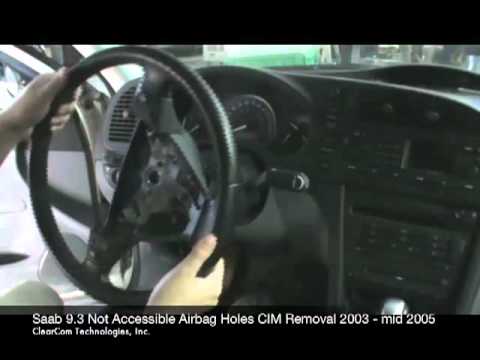
To remove the lighting control group or CIM (Chassis IntEGRation Module), you must first remove the steering wheel. Start by disconnecting the airbag: locate the holes behind the spokes of the steering wheel and using a small flat screwdriver, release the retaining springs and disconnect the detonator connectors (it is advisable to disconnect the battery to avoid warning lights).
Next, unscrew the steering wheel retaining bolt and pull it off; detach the leather gaiter from behind the CIM module and disconnect the connector; at this point, open the retaining tab of the module on the steering column and pull it forward. You may also disconnect the control levers. Proceed in reverse for reinstallation.
Updated on 9 February 2026 by ScegliAuto
Video tutorial
Related tutorials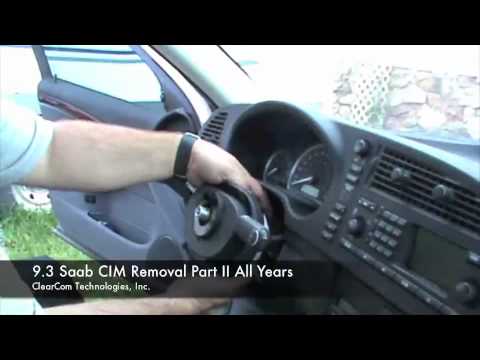
Saab 9 3
(2002-2014 /
MK 2)
The first operation is to adjust the steering wheel fully down and out to facilitate disassembly. Then, disconnect the airbag container: behind the s…
Saab 9 3
(2002-2014 /
MK 2)
The AIRBAG container is secured to the steering wheel by springs: to dismantle it, you need to release the springs. Behind the steering wheel, at the…
Saab 9 3
(1998-2003 /
MK 1)
Today we will see the main instructions useful for disassembling and replacing the instrument panel of the Saab 9-3. First of all, we get on board th…
Other guides you may be interested in
|
Resetting the Tyre Pressure Light on a Fiat 500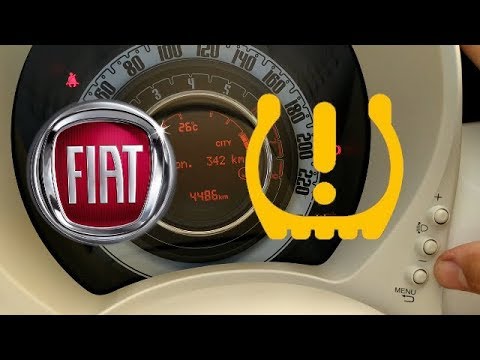
In this brief and simple video tutorial, you will learn how to reset the tyre pressure warning light on a Fiat 500. First, get into your vehicle and navigate to the menu by pressing the appropriate button: go to the tyre pressure option and click again. Then click 'yes' again, and it will automatically perform the procedure to reset the tyre pressure warning light! Remember, before carrying out this operation, check for any faults with the tyres: resolve the issue and then reset the light! by ScegliAuto More videos
|
|
For advertising on this site Write to info@scegliauto.com
ScegliAuto is not responsible for any inaccuracy of the data in the lists. To report any inaccuracy or your business (if you own the business in question), please write to info@scegliauto.com
Number of seconds to generate the page: 0.099
(c) ScegliAuto 2026 - info@scegliauto.com - Privacy policy VAT number: IT01247470535 |