|
Do it yourself
| |||
| ||||
Smart - Video tutorial
Model: Smart Smart
451
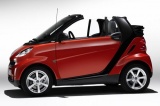
- Years 2007-2015 Get the LED lamp kit and a 9V battery. Test the lamps using the 9V battery by connecting it to the red, positive and black negative wires. Remove the closing caps prepared for this installation on the front bezel of the car. Insert the LED headlight into the previously freed hole by simply pushing it until the catches click. With a pliers similar to the one used to remove the seeger, that is, it opens instead of closing like the normal pliers, apply the three springs on the back to fix the headlight definitively. For the electrical connection it is essential to be very careful. It is essential to find the correct power supply wire. For this operation it is necessary to switch the position lights on and off by probing the cables from time to time until you find the right one. With the special â € œladroâ € take the voltage to be connected to the red wire while the black one is connected to the vehicle ground by means of an eyelet and screw. Test the operation.
Posted on 26 June 2023 by ScegliAuto
Other guides that may interest you
|
Frequently Asked QuestionsHandbrake adjustment on Ford Ecosport
First remove the plastic profile at the base of the gear lever. To do this, slightly widen the side edges and carefully lift it to release it. There is no need to remove it completely, just move it forward to avoid bother. Now remove the plastic center console around the handbrake by first working from the rear to release it and lifting it until the brake lever passes. Also in this case it is not necessary to remove it completely but, paying attention to the connected cables, it can be stowed in front of the passenger seat. At this point we notice that at the base of the handbrake lever, on the front, we find a nut. By acting on it, with a 10 wrench, we can adjust the brake force, increasing it by turning the nut clockwise, or decreasing it by turning it counterclockwise. Once adjusted, the center console can be repositioned first, pressing lightly to engage it, and then the profile of the gearbox base. by ScegliAuto More videos
|
|
For advertising on this site Write to info@scegliauto.com
ScegliAuto is not responsible for any inaccuracy of the data in the lists. To report any inaccuracy or your business (if you own the business in question), please write to info@scegliauto.com
Number of seconds to generate the page: 0.054
(c) ScegliAuto 2024 - info@scegliauto.com - Privacy Policy VAT number: IT01247470535 |


