
|
Do it yourself
| |||
| ||||


Smart - Video tutorial
Model: Smart Smart
450
- Years 1998-2007 The video deals with the replacement of the left front lock of a Smart Fortwo (W450) produced from 1998 to 2007. Needed: Phillips screwdriver, pliers, small washable plastic material. There were three Phillips screws on the door sheet, remove them. At this point it is sufficient to remove the handle with the plastic lever. Now remove the complete lock with cable. Insert the complete handle into the door, carrying out the previous operations in reverse order, paying particular attention to repositioning the plastic cover which may have acquired fragility over the years. At the end of the reassembly, repeatedly test the correct functioning of the system, manually opening the door several times and if necessary repeat the test with the remote control closure.
Posted on 12 December 2023 by ScegliAuto
This video is currently unavailable
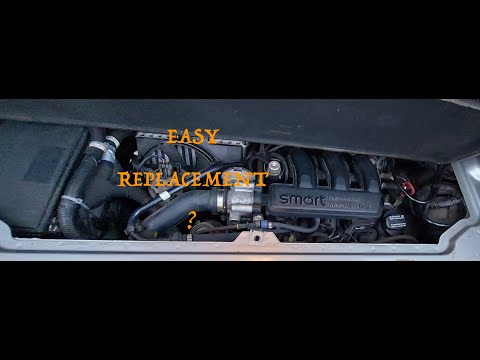 How to replace the air filter of the Smart 450
Smart (1998-2007 / 450) If you do not want to have problems with overheating or loss of power of the engine of your Smart 450 then you must necessarily replace the air filte 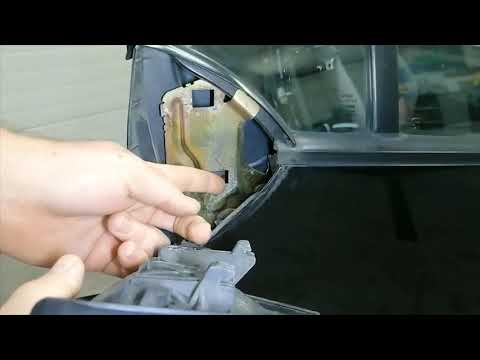 How do you remove the Smart 450 lock actuator?
Smart (1998-2007 / 450) In order to remove the Smart 450 lock actuator, you need to remove the internal cover in correspondence with the external rearview mirror, in order t 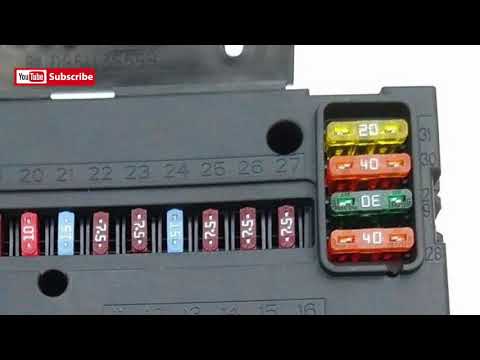 Where is the Smart 450 fuse box located
Smart (1998-2007 / 450) In this video we can see where the fuse box of the Smart 450 is located. In the Smart 450 we can find two fuse boxes: one positioned on the driver's Other guides that may interest you
|
Frequently Asked QuestionsHow to set the time in the Citroen DS3?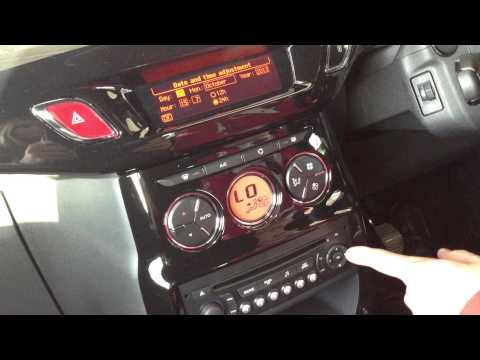
In this tutorial we can see how to set the time in the Citroen DS3, an extremely simple and fast operation, to be carried out for example after being left with the battery on the ground or following the transition to winter and summer time. First of all, turn on the instrument panel, then press the "Menu" button on the center console and enter the settings section. Then select "Display configuration", then "Date and time configuration" and proceed with the time change using the same keys. Once finished, we select "OK" at the bottom left. by ScegliAuto More videos
|
|
For advertising on this site Write to info@scegliauto.com
ScegliAuto is not responsible for any inaccuracy of the data in the lists. To report any inaccuracy or your business (if you own the business in question), please write to info@scegliauto.com
Number of seconds to generate the page: 0.043
(c) ScegliAuto 2024 - info@scegliauto.com - Privacy Policy VAT number: IT01247470535 |