
|
Do it yourself
| |||
| ||||


How to reset the service on Smart 453
Model: Smart Smart
453
- Years 2014-2022
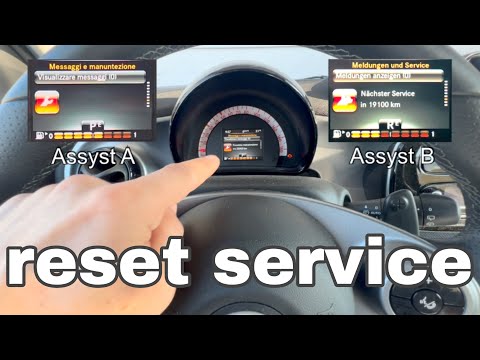
In this video tutorial you can see how it is possible to perform a service reset on Smart 453, by following a few simple steps that will guide you towards correct management of your vehicle independently. First you must have your vehicle serviced, then get into your car and close all the doors including the trunk; secure the vehicle with the handbrake on; turn the key to position 1 to turn on the ignition only and not the engine. Press the arrow key on the steering wheel until you scroll through the MENU, select "messages and service". Press and hold the OK button in the steering wheel for about 20 seconds; at this point the service wrench light will start flashing. Service restored.
Posted on 29 September 2022 by ScegliAuto
Video tutorial
Related tutorials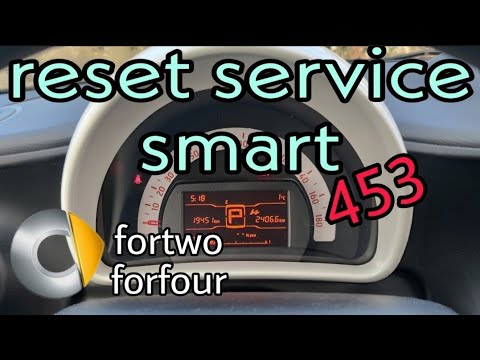
Smart
(2014-2022 /
453)
Let's find out in this video tutorial how to reset the oil change routine maintenance service light on a Smart Fortwo 453, third series. First of all…
Smart
(2014-2022 /
453)
The procedure for resetting the Service light on the Smart 453 involves inserting the key into the ignition and then turning it to turn on the instru…
Smart
(2014-2022 /
453)
The video shows us the instructions to reset the service light on the latest model of Smart, that is the one designated with the initials 453. As a f…
Other guides you may be interested in
|
Frequently Asked QuestionsHow to Remove the Air Vents
Let's see how to remove the air vents (center dashboard) from an Audi A6. Use multiple levers (screwdriver) to remove the vents. Pry at the top and bottom with the levers (as shown in the video) until you release the clips inside; detach the air vents and pull them out from the dashboard. Once you have pulled the vents outward, disconnect the two power connectors (as shown in the video) and remove the piece. Prepare to perform maintenance inside the dashboard, and then start installing the new air vents; connect the terminals and secure everything. by ScegliAuto More videos
|
|
For advertising on this site Write to info@scegliauto.com
ScegliAuto is not responsible for any inaccuracy of the data in the lists. To report any inaccuracy or your business (if you own the business in question), please write to info@scegliauto.com
Number of seconds to generate the page: 0.125
(c) ScegliAuto 2026 - info@scegliauto.com - Privacy policy VAT number: IT01247470535 |