
|
Do it yourself
| |||
| ||||


How to replace the wiper blades of a Smart ForTwo?
Model: Smart Smart
453
- Years 2014-2022
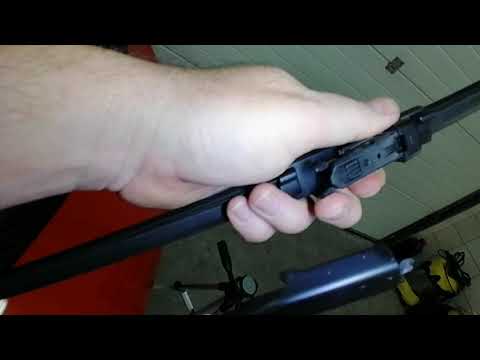
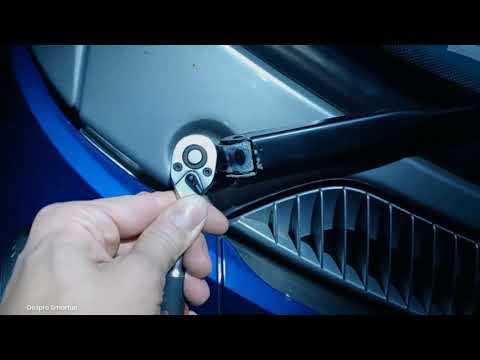
To replace the windshield wiper blades of a Smart ForTwo, start by lifting the wiper arm away from the windshield. You will find a small clip or tab at the base of the blade. Press this tab to unlock the blade from the arm. Once unlocked, slide the old blade outward from the arm to remove it. Take the new blade and slide the arm hook into the blade slot until you hear a click, ensuring it is securely attached. Repeat the same procedure for the other wiper blade, if necessary. After replacing the blades, carefully bring the wiper arms back to their original position against the windshield. Start the vehicle and test the wipers to ensure they are working properly and that the new blades clean the windshield without leaving streaks. This procedure is relatively simple and does not require special tools, making it easy to perform even for those with little experience in car maintenance.
Posted on 1 August 2024 by ScegliAuto
Video tutorial
Related tutorials
Smart
(2014-2022 /
453)
This short and simple guide will show us how to disassemble and replace the windshield wipers (front and rear) of the Smart Fortwo. First of all, let…
Smart
(2007-2015 /
451)
Let's see in this short and simple video how to remove and replace the wiper blades of the Smart Fortwo 451, but also of the 453. First, let's move t…
Smart
(1998-2007 /
450)
In order to replace the windshield wipers of the Smart ForTwo, you need to lift the small plastic cover at the base of the arm that controls the move…
Other guides you may be interested in
|
How to Replace the Front Headlamp Bulb on a Volkswagen Touareg
To perform this operation, release the bonnet using the lever and lift it to secure it with the prop rod. Then disconnect the battery terminals to protect any sensitive circuits. Locate the hook, which when rotated allows you to extract the headlamp. After removing the last bolts, you can take out the headlamp from its position and also disconnect the connectors at the back to completely remove it, allowing you to proceed with replacing the necessary components. Retrace the steps described for reassembly. by ScegliAuto More videos
|

|
For advertising on this site Write to info@scegliauto.com
ScegliAuto is not responsible for any inaccuracy of the data in the lists. To report any inaccuracy or your business (if you own the business in question), please write to info@scegliauto.com
Number of seconds to generate the page: 0.049
(c) ScegliAuto 2026 - info@scegliauto.com - Privacy policy VAT number: IT01247470535 |