
|
Do it yourself
| |||
| ||||


How to Install a Backup Camera in the Factory Screen of the Toyota Hi Lux
Model: Toyota HiLux
An30, An20, MK 7, An10
- Years 2005-2015
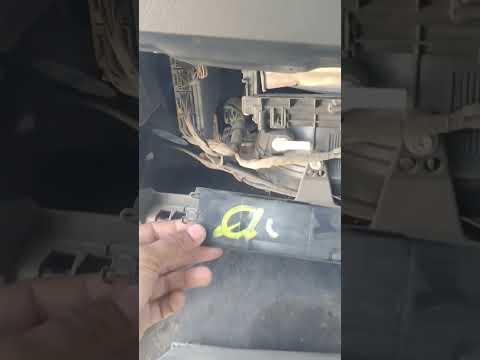
How to install a rear camera on the Toyota Hi Lux while continuing to use the factory screen! Start by removing the dashboard around the screen, which is only held in place by clips and comes off easily. Unscrew the radio/screen unit and connect the plug for your camera without disconnecting the others. You will need an extension because the camera's cable is quite long. It must run from under the dashboard to the passenger kick panel (in this case because it is a right-hand drive), then it will go under the body to reach the license plate, where you can position it as you prefer. You will need to do some tests to ensure the camera captures as much as possible and sees exactly what you want. To do this, you need to bridge the red wire of the camera with the black wire of the radio's power supply. If you prefer, you can use a wire tap; you can get 10 for a dollar, and it’s safer than cutting the wire. After doing all your tests, put everything back in place, and the job is done.
Updated on 29 July 2026 by ScegliAuto
Video tutorial
Related tutorials
Toyota HiLux
(2005-2015 /
An30, An20, MK 7, An10)
If you are experiencing malfunctions in the control unit of your Toyota Hi Lux and want to identify the causes using a specific diagnostic tool, then…
Toyota HiLux
(2005-2015 /
An30, An20, MK 7, An10)
After driving several miles with your Toyota HiLux (2005-2015), it is necessary to replace the cabin air filter to continue ensuring optimal air qual…

Toyota HiLux
(2005-2015 /
An30, An20, MK 7, An10)
If you own a 2012 Toyota Hi Lux and don't know where the fuse box is located, all you have to do is follow the steps described below to locate it wit…
Other guides you may be interested in
|
How to Connect the Cables to the Battery of the Citroen Xsara Picasso?
In this tutorial, you will see how to connect the cables to the battery of the Citroen Xsara Picasso, useful if you need to recharge it or perform an emergency start. First, ensure the key is not inserted, then open the bonnet and move to the front of the left headlamp. Next, locate the bolt just behind the filter box and connect the positive terminal clamp to it. Now you can connect the negative terminal to any point on the chassis, such as the indicated point. Once the operation is complete, ensure you disconnect the negative first and then the positive. by ScegliAuto More videos
|

|
For advertising on this site Write to info@scegliauto.com
ScegliAuto is not responsible for any inaccuracy of the data in the lists. To report any inaccuracy or your business (if you own the business in question), please write to info@scegliauto.com
Number of seconds to generate the page: 0.072
(c) ScegliAuto 2026 - info@scegliauto.com - Privacy policy VAT number: IT01247470535 |
