
|
Do it yourself
| |||
| ||||


1994-2015 Volkswagen Gol (G2, G3, G4)
Tutorial - For model years: 1994, 1995, 1996, 1997, 1998, 1999, 2000, 2001, 2002, 2003, 2004, 2005
Mechanics (1)Electrical System and Lighting (7)Interior and Accessories (1)Vehicle Controls and Functions (1) Volkswagen Gol (1994-2015 / G4, G3, G2) How to remove the airbag of the 2013 VW Gol Today we will explain how to remove the steering wheel airbag on a 2013 Volkswagen Gol. Before performing this operation, it is advisable to disconnect the …Read all… Posted on 27 April 2025 by ScegliAuto  Volkswagen Gol (1994-2015 / G4, G3, G2) Replacement of the air filter of the Volkswagen Gol G4 The replacement of the air filter that feeds the injection system of the Volkswagen Gol is one of the operations included in the maintenance service to be …Read all… Posted on 8 February 2025 by ScegliAuto  Volkswagen Gol (1994-2015 / G4, G3, G2) Where are the fuses located in the Volkswagen Gol? The fuse boxes in the Volkswagen Gol contain the fuses that control the operation of various devices: in this type of vehicle, you can find two boxes. The …Read all… Posted on 30 October 2026 by ScegliAuto  Volkswagen Gol (1994-2015 / G4, G3, G2) Location of the Fuse Boxes on the Volkswagen Gol MK1 This video shows the general indication of the fuses located in the cabin of the Volkswagen Gol MK1: the owner's manual specifies their functions; for example, …Read all… Posted on 16 October 2026 by ScegliAuto  Volkswagen Gol (1994-2015 / G4, G3, G2) What is the fuse diagram for the Gol G4? The fuse diagram is simply a map, or a detailed list, of all the fuses located inside the fuse boxes. There are two fuse boxes: one is located in the engine …Read all… Posted on 12 October 2026 by ScegliAuto  Volkswagen Gol (1994-2015 / G4, G3, G2) Fuse Location and Diagram on the Volkswagen Gol G4 In this video, see the fuse diagram for the Volkswagen Gol G4. Regarding their location, the fuse box is found in the passenger compartment, located in the …Read all… Posted on 2 October 2026 by ScegliAuto  Volkswagen Gol (1994-2015 / G4, G3, G2) How to Remove the Radio from the VW Gol Trend Today, you will learn the steps to remove the radio from the Volkswagen Gol. To remove the radio, insert a flat, serrated tool into the left slot to help you …Read all… Posted on 19 September 2026 by ScegliAuto
Volkswagen Gol (1994-2015 / G4, G3, G2)Where Are the Fuses Located in the Volkswagen Gol? Inside the Volkswagen Gol, all fuses are contained within the single fuse box installed in the vehicle: in this car model, you will find only one fuse box. It …Read all… Posted on 14 September 2026 by ScegliAuto  Volkswagen Gol (1994-2015 / G4, G3, G2) Where Are the Fuses Located on the Volkswagen Gol? On the Volkswagen Gol, all the fuses are contained within the single fuse box installed in the vehicle: in this car model, you can find it inside the cabin, in …Read all… Posted on 8 September 2026 by ScegliAuto  Volkswagen Gol (1994-2015 / G4, G3, G2) Where Are the Fuses Located on a Volkswagen Gol? All the fuses in a Volkswagen Gol are housed within the designated fuse boxes installed in the vehicle: this type of car has two fuse boxes. The first is …Read all… Posted on 13 August 2026 by ScegliAuto |
What does the "Code 82" message indicate in the Chevrolet Orlando and how to remove it?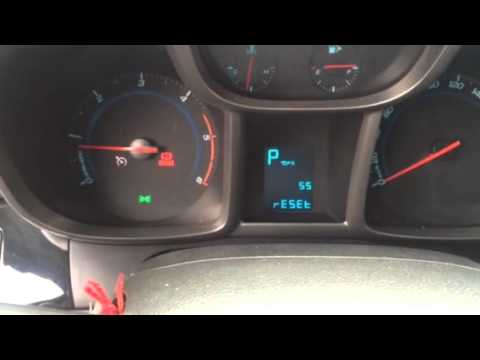
If the "Code 82" message appears on the dashboard of your Chevrolet Orlando, it means that the service interval in miles or time has been reached. Once all scheduled maintenance tasks are completed, you can remove the warning by following the simple procedure shown in this tutorial. First, insert the key and turn on the ignition, then press the "MENU" button located on the left control stalk and navigate to the screen displaying the "Reset" option. At this point, press the "SET/CLR" button at the end of the same stalk and confirm the reset. by ScegliAuto More videos
|
|
For advertising on this site Write to info@scegliauto.com
ScegliAuto is not responsible for any inaccuracy of the data in the lists. To report any inaccuracy or your business (if you own the business in question), please write to info@scegliauto.com
Number of seconds to generate the page: 0.124
(c) ScegliAuto 2026 - info@scegliauto.com - Privacy policy - About us VAT number: IT01247470535 |
