
|
Do it yourself
| |||
| ||||


|
In this video tutorial we can see how to repair the high pressure pump on an Audi Q3. The first thing to do is to lift the bonnet and secure it with the special rod; second step lift the cover, inside the crankcase there is the timing belt which must be checked. If the belt has no problems, you can move on to check the sensor that manages the pressure of the high pressure pump, then check if there are iron chips inside, after understanding what the problem is, at this point you need to remove the timing belt to get to the high pressure pump, then remove the high pressure pump, open the pump and replace all four injectors because all the chipboard in the needle and in the nebulizer create craters. Subsequently replace the low pressure pump inside the tank and also the diesel filter must be replaced and all the pipes, both rigid and flexible, must be cleaned.
Posted on 28 May 2022 by ScegliAuto
Video tutorial
Related tutorials
Audi Q3
(2018-2025 /
F3)
To make the tire pressure warning light on the Audi Q3 disappear completely, you will first need to inflate the tires until they are brought back to …

Audi Q3
(2011-2018 /
8U)
The tire pressure warning light that appears on the instrument panel of the Audi Q3 will first of all require all tires to be brought to the recommen…

Audi Q3
(2018-2025 /
F3)
In this tutorial we can see how to reset the tire pressure warning light in the Audi Q3, an extremely simple and quick operation, to be done only onc…
Other guides you may be interested in
|
How to Remove the Headlight Bulbs on a Toyota Rav4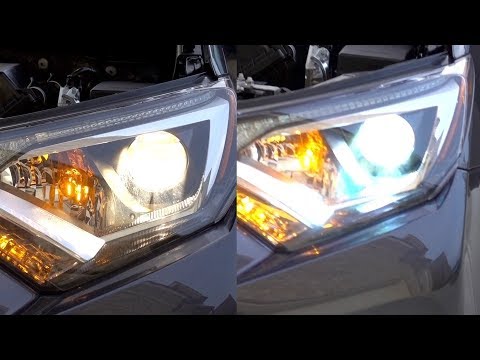
Let's see how to remove the headlight bulbs on a Toyota Rav4. Open the bonnet by pulling the lever located at the bottom right of the dashboard and secure it. Locate the inspection cap (if present) on the headlight and remove it (located at the rear of the headlight). At this point, you will find the bulbs with metal clips; pull the bulb holders out of the headlight and extract the damaged bulb using a screwdriver and pliers. Fit the new bulb (ensuring it is the correct type and size), insert the bulb holder back into the headlight housing, and close the headlight with the inspection cap. Test the lights to ensure they are functioning correctly. by ScegliAuto More videos
|

|
For advertising on this site Write to info@scegliauto.com
ScegliAuto is not responsible for any inaccuracy of the data in the lists. To report any inaccuracy or your business (if you own the business in question), please write to info@scegliauto.com
Number of seconds to generate the page: 0.064
(c) ScegliAuto 2026 - info@scegliauto.com - Privacy policy VAT number: IT01247470535 |