
|
Do it yourself
| |||
| ||||


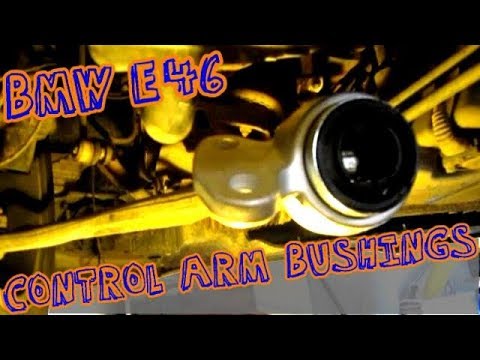
Replacing Suspension Arm Bushings
Model: BMW Serie 3
E46
- Years 1998-2006
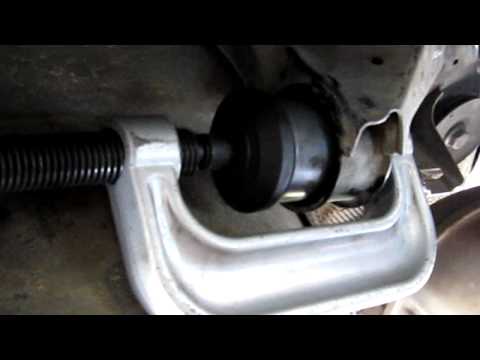
The necessary tools are a ratchet wrench, a set of open-end wrenches, a bushing installer, and replacement bushings. Lift the car on a lift and remove the wheel to access the mechanics. Locate the suspension connection and proceed with the removal by first taking off the protective cover and then unscrewing all the bolts. Use a small hammer and a punch to drive the bolts out of their seats after thoroughly spraying them with penetrating oil. Remove the worn bushings and, if necessary, use a drill with a cutter to remove the rubber. Once the old bushing is removed, insert the new one into the arm using the appropriate installer. Reassemble the rest of the mechanics that were previously removed.
Updated on 5 February 2026 by ScegliAuto
Video tutorial
Related tutorials
BMW Serie 3
(1998-2006 /
E46)
The necessary tools are a ratchet wrench, a set of combination wrenches, a bushing installer, and replacement bushings. Lift the vehicle on a lift to…
BMW Serie 3
(1998-2006 /
E46)
If the bushings of the suspension control arm are damaged, you can purchase just the replacement bushings (silent block) instead of the entire arm. T…
BMW Serie 3
(1998-2006 /
E46)
The video shows how to replace the bushings of the front control arms. First, lift the car slightly with a ramp to access the underside. The procedur…
Other guides you may be interested in
|
How to Remove the Headlight Bulb on a Honda Civic
Are the front headlight bulbs on your Honda Civic faulty? Follow this instructional video for the disassembly process. Open the bonnet of the engine compartment, remove the inspection caps from the headlights using a screwdriver, detach the bulb holders from the headlight, and disconnect the respective power connectors. Replace the damaged bulbs with new ones of the same size and voltage. After replacing the bulbs, reinstall the bulb holder in the headlight housing. Finally, close the rear of the headlights with the inspection caps. Test the lights to ensure they are functioning correctly. by ScegliAuto More videos
|
|
For advertising on this site Write to info@scegliauto.com
ScegliAuto is not responsible for any inaccuracy of the data in the lists. To report any inaccuracy or your business (if you own the business in question), please write to info@scegliauto.com
Number of seconds to generate the page: 0.060
(c) ScegliAuto 2026 - info@scegliauto.com - Privacy policy VAT number: IT01247470535 |