
|
Do it yourself
| |||
| ||||


Removing Car Radio for Repair
Model: BMW Serie 3
E46
- Years 1998-2006
Remove the plastic trim from the side moldings, then unscrew the retaining screws of the radio to allow for extraction. Disconnect the various connectors and remove the car radio. Remove the old wiring harness and install the wiring provided with the new radio, paying attention to the references. Connect the adapter to the antenna cable with the new connector. Reconnect the cables to the radio by plugging in the respective connectors and insert the radio into its slot, being careful not to pinch the cables until it is secured. Screw in the fastening screws. Turn on the radio to check functionality.
Updated on 8 February 2026 by ScegliAuto
Video tutorial
Related tutorials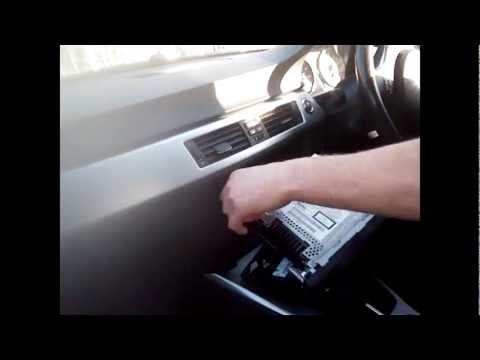
BMW Serie 3
(2005-2013 /
E92, E90, E91)
Remove the plastic trim, then unscrew the mounting screws of the stereo to allow for extraction. Disconnect the various connectors and remove the ste…

BMW Serie 3
(2005-2013 /
E92, E90, E91)
The instructions provided in this guide will allow us to remove and replace the stock radio of the BMW 3 Series. First, we get inside the vehicle and…

BMW Serie 3
(1998-2006 /
E46)
Today's step-by-step instructions will show us how to disassemble and replace the stock radio of the BMW 3 Series. First, we get into the car and sta…
Other guides you may be interested in
|
How to Replace the Gear Shift Gaiter of the Honda CR-V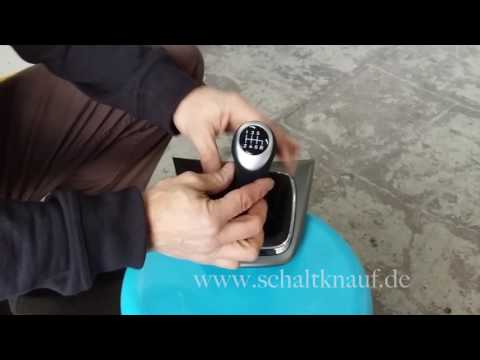
You can purchase an aftermarket gear shift cover complete with a knob, made of leather with coloured stitching. The disassembly is quite straightforward: start by unscrewing the gear shift knob by twisting it. Next, detach the trim at the base of the gear lever by prying along the edges. Then, remove the chrome trim that holds the gaiter in place, peeling off the leather edges from the plastic support. Apply new double-sided adhesive to the plastic tabs to insert and stick the edges of the new gaiter, securing it with the chrome trim. Finally, fit the gaiter complete with the knob onto the gear lever, securing it with the appropriate screws and reattaching the trim to the tunnel support. by ScegliAuto More videos
|
|
For advertising on this site Write to info@scegliauto.com
ScegliAuto is not responsible for any inaccuracy of the data in the lists. To report any inaccuracy or your business (if you own the business in question), please write to info@scegliauto.com
Number of seconds to generate the page: 0.048
(c) ScegliAuto 2026 - info@scegliauto.com - Privacy policy VAT number: IT01247470535 |