
|
Do it yourself
| |||
| ||||


How to replace the left rear door handle on your Chevrolet Suburban
Model: Chevrolet Suburban
Gmt900
- Years 2007-2014 To replace the outside handle of the Chevrolet Suburban, let's start by removing the door panel: using a small flathead screwdriver, remove the clip that holds the lock, the cover behind the door handle, the cover where the handle to close the hatch and the plastic where the electric window switch is (when it is removed, disconnect the connector); once the covers have been removed, unscrew the 3 screws (1 behind the door handle and the other 2 on the handle to close the door), with a 10 socket wrench, then remove the panel from the joints by pulling it and when it is removed from the joints at the bottom we lift it up and take it off. Once the panel has been removed, we release the cord from the handle, remove the plastic attached to the door; once the plastic has been removed, remove the black cap from the handle screw, with a 10 socket wrench unscrew the two handle screws (be careful not to let them fall into the door); with a small slotted screwdriver, release the clip that holds the door lock bar (bottom left), moving it; at this point, we remove the handle from the outside by also passing the lock bar. Once the handle has been removed, we clean the part where the handle was; take the new handle, insert the lock bar into the hole provided and ensure that the handle opening mechanism is in its seat; Once the handle is stuck, stop it by hooking the clip at the bottom left that holds the lock bar, screw in the two screws on the handle, helping us with adhesive tape, put the black cap on the handle screw back on, pass the window winder connector through the plastic which protects the bodywork and we attach it to the door. Now we take the door panel, hook it first with the hooks at the bottom, then pass the locking rod through, hook the handle cord, pass the window regulator connector and fit the panel to the door with taps with our hands . Now, with pliers, raise the lock rod, insert the 3 panel screws screwing them in with a 10 socket wrench, reconnect the window lifter connector and fit the plastic where the window lifter button is, put the screw caps and the lock rod.
Posted on 22 September 2024 by ScegliAuto
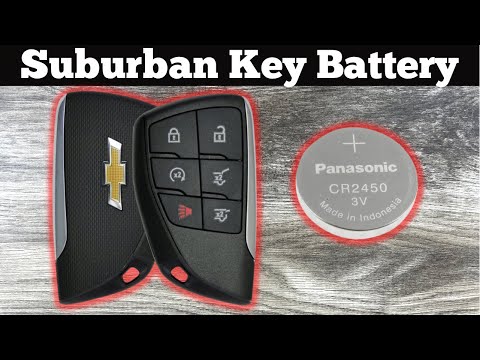 How to replace the battery of the Chevrolet Suburban remote control?
Chevrolet Suburban (2021-2025 / Gmt1yc) Replacing the battery of the Chevrolet Suburban remote control is a very simple and inexpensive operation, let's see how to proceed in this tutorial. 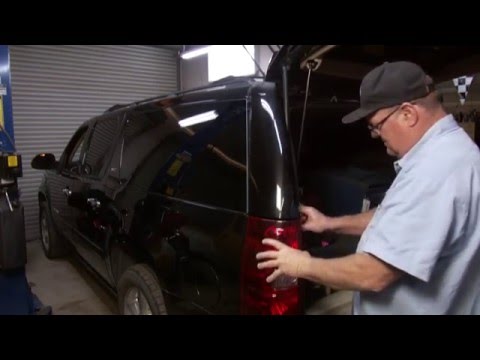 How to replace the rear lights in a Chevrolet Suburban?
Chevrolet Suburban (2007-2014 / Gmt900) As we can see in this tutorial, replacing the rear lights on a Chevrolet Suburban is an extremely simple and fast operation. Before proceeding, make  How to replace the door seal in the Chevrolet Suburban?
Chevrolet Suburban (2007-2014 / Gmt900) In this tutorial we can see how to replace the door seal in the Chevrolet Suburban, a very simple and fast operation. To do this, we will need a plas Other guides that may interest you
|
How to remove the telepass holder from the windshield
Today we will explain how to remove the telepass holder from a vehicle's windshield. Removing the telepass holder from the windshield is a very simple and quick operation to perform independently, you just need to use nylon thread that you will need to pull towards the holder and pass it between the holder and the clip. After performing this operation, the holder will be removed. There may be glue residues on the windshield that can be removed with a solvent suitable for glass cleaning. After cleaning everything, it is possible to mount another telepass holder on the windshield in the same position as the one removed or elsewhere. by ScegliAuto More videos
|
|
For advertising on this site Write to info@scegliauto.com
ScegliAuto is not responsible for any inaccuracy of the data in the lists. To report any inaccuracy or your business (if you own the business in question), please write to info@scegliauto.com
Number of seconds to generate the page: 0.135
(c) ScegliAuto 2025 - info@scegliauto.com - Privacy Policy VAT number: IT01247470535 |