
|
Do it yourself
| |||
| ||||


How to Charge a DS7 E-Tense
Model: DS DS 7
MK 1
- Years 2020-2026
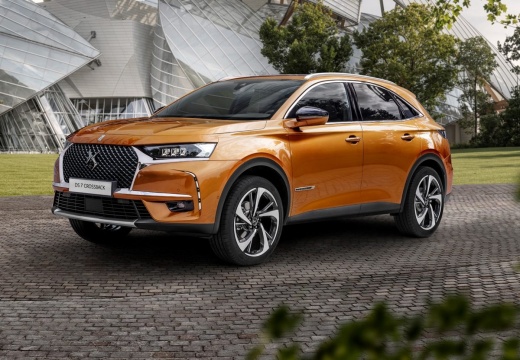
This video explains the use of the DS 7 E-Tense, which is the hybrid version with both a petrol engine and a plug-in electric motor. The dashboard shows that we are currently very low on fuel, with only 4 miles of range, as indicated at the bottom right. Enter the display using the button at the bottom left, and select the charging time. This is important if you have a dual-rate contract with cheaper rates at night; you can take advantage of this using the delayed charging button. We will charge it via the wall box, which essentially transforms household energy into a current suitable for charging the vehicle. Naturally, as it is a hybrid, the charging is faster compared to a fully electric vehicle; a full charge takes about 3 to 3.5 hours. When charging at a charging station, a green light indicates that charging is in progress; the larger plug goes into the vehicle and the smaller one into the charging station. To start delayed charging, simply press the clock icon found at the top left. The colour of the LED around the socket changes to blue, indicating that the vehicle is waiting to charge. If the LED turns red, it means there is a malfunction. The display shows all information regarding range and charging status.
Updated on 12 September 2026 by ScegliAuto
Video tutorial
Related tutorials
DS DS 7
(2020-2026 /
MK 1)
Resetting the tire pressure warning light in the Citroen DS7, as we can see in this tutorial, is an extremely simple and quick operation. Before proc…

DS DS 7
(2020-2026 /
MK 1)
In the following mini guide, we will explain how to manually reset the service light of your DS7 quickly and correctly. First, you need to get into t…

DS DS 7
(2020-2026 /
MK 1)
To reset the tire pressure warning light on the Citroen DS7, you can follow these steps: Turn on the ignition without starting the engine. Press the …
Other guides you may be interested in
|
How to Replace the Remote Battery for the Volvo XC40?
In this tutorial, you will see how to replace the battery in the remote for the Volvo XC40, a very simple and quick operation. For this, you will need a replacement battery of type CR2032 and possibly a small flathead screwdriver. First, remove the front cover by pressing the button on the metal ring, then locate the second button, press it as well, and remove the opposite cover. Next, open the circular cap, take out the old battery, and insert the new one in the opposite direction. Finally, reassemble everything. by ScegliAuto More videos
|
|
For advertising on this site Write to info@scegliauto.com
ScegliAuto is not responsible for any inaccuracy of the data in the lists. To report any inaccuracy or your business (if you own the business in question), please write to info@scegliauto.com
Number of seconds to generate the page: 0.269
(c) ScegliAuto 2026 - info@scegliauto.com - Privacy policy VAT number: IT01247470535 |
