
|
Do it yourself
| |||
| ||||


How to change the timing belt of Fiat Ducato 2.3 MultiJet
Model: Fiat Ducato
X250
- Years 2006-2014
In this video we see how to replace the timing belt of a Fiat Ducato 2.3 Diesel engine: in order to access the belt, the right headlight, the expansion tank for the cooling system, and the windshield washer tank must be removed. We remove the cover and then unscrew the bolts holding the tensioner pulley, using a locking tool to position it correctly in the camshafts so that we can properly reinstall the belt and replace components such as the water pump and fuel pump, as well as all gaskets that must be correctly positioned. At 3:37 minutes we see the exact positioning of the belt, starting with the tensioner pulley, which must be installed correctly as explained in detail by the youtuber. After installing the belt, we manually turn the engine at least eight times and then tighten the tensioner pulley again.
Posted on 15 November 2025 by ScegliAuto
Video tutorial
Related tutorials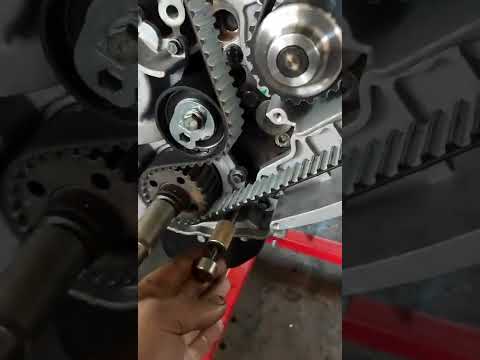
Fiat Ducato
(2006-2014 /
X250)
This guide provides key information on how and when to remove and replace the timing belt on the Fiat Ducato 2.3 Multijet; generally, for this type o…

Fiat Ducato
(2014-2026 /
X290)
Today's main instructions will allow us to disassemble and replace the timing belt of the Fiat Ducato 2.3 Multijet. First, we lift the vehicle and st…

Fiat Ducato
(2006-2014 /
X250)
Let's look at the instructions on how to disassemble and replace the timing belt of the Fiat Ducato 2.3 MultiJet. First, we open the vehicle's hood a…
Other guides you may be interested in
|
How to Connect the Cables to the Battery of the Citroen Xsara Picasso?
In this tutorial, you will see how to connect the cables to the battery of the Citroen Xsara Picasso, useful if you need to recharge it or perform an emergency start. First, ensure the key is not inserted, then open the bonnet and move to the front of the left headlamp. Next, locate the bolt just behind the filter box and connect the positive terminal clamp to it. Now you can connect the negative terminal to any point on the chassis, such as the indicated point. Once the operation is complete, ensure you disconnect the negative first and then the positive. by ScegliAuto More videos
|
|
For advertising on this site Write to info@scegliauto.com
ScegliAuto is not responsible for any inaccuracy of the data in the lists. To report any inaccuracy or your business (if you own the business in question), please write to info@scegliauto.com
Number of seconds to generate the page: 0.170
(c) ScegliAuto 2026 - info@scegliauto.com - Privacy policy VAT number: IT01247470535 |
