
|
Do it yourself
| |||
| ||||


How to replace the bulbs of the high and low beams of the Fiat Freemont
Model: Fiat Freemont
MK 1
- Years 2011-2016
The guide shows how to replace the H11 and HB3 bulbs of the Fiat Freemont. To carry out this operation, you can try without having to remove the headlight nacelle or the wheel arch. Starting with the high beams, which are placed towards the radiator and the model is HB3. To extract the lamp holder it is necessary to rotate the connector anticlockwise and extract it. Disconnect the electric cable from the lamp holder. When fitting the new bulb, pay attention to the polarity of the connector to avoid possible malfunctions. To replace the H11 lamps, ie the low beams, you may have difficulty as the space is very small. By turning the motor of the lights, you will be able to obtain a little more space to carry out the disassembly. Remove the lamp holder by turning it anticlockwise. Disconnect the connector and install a new lamp. Reassemble everything and check the correct functioning of the headlights.
Posted on 25 November 2021 by ScegliAuto
Video tutorial
Related tutorials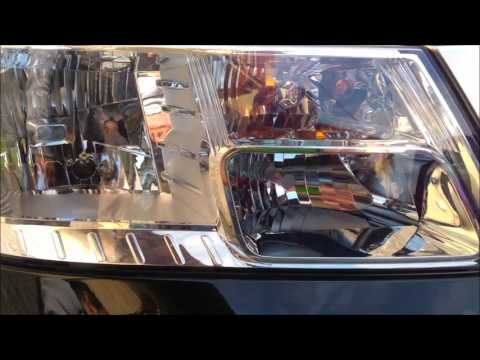
Fiat Freemont
(2011-2016 /
MK 1)
Replacing the original bulbs (H11 dipped beam, Hb3 main beam) in the front headlights with LED types will certainly improve road illumination and vis…
Fiat Freemont
(2011-2016 /
MK 1)
Before we can start, we will have to go and completely rotate the wheels of our Fiat Freemont to the right. So let's start by disengaging the interna…
Fiat Freemont
(2011-2016 /
MK 1)
Before starting, we will have to turn the wheels of our Fiat Freemont to the right. So let's start by disengaging the internal wheel arch, helping us…
Other guides you may be interested in
|
Timing Belt Replacement on Audi Q5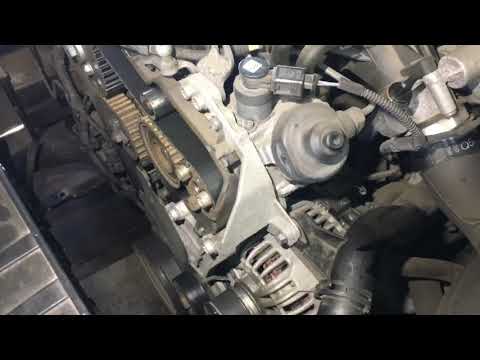
The timing belt on the Audi Q5 has reached its mileage limit, so what should you do? Let's go through the removal of the belts on the Q5. Open and lift the hood of the engine, then remove the engine soundproofing panel. Once these steps are completed, remove the plastic covers of the belts located on the left side of the engine. Loosen the second tensioner and slide the belt out of its seat. After installing the new belt, use a wrench to install the tensioner pulley, and tighten it until the belt has the correct tension (install both belts). Reinstall the covering plastics. Start and test the Audi Q5 engine. by ScegliAuto More videos
|

|
For advertising on this site Write to info@scegliauto.com
ScegliAuto is not responsible for any inaccuracy of the data in the lists. To report any inaccuracy or your business (if you own the business in question), please write to info@scegliauto.com
Number of seconds to generate the page: 0.096
(c) ScegliAuto 2026 - info@scegliauto.com - Privacy policy VAT number: IT01247470535 |