
|
Do it yourself
| |||
| ||||


|
Model: Harley Davidson Sportster Iron 883
Perform this operation every three months. Unscrew the lower filter (not the visible one) and it can be removed. Use a simple washing-up liquid and a toothbrush to clean all the crevices. Dry the filter with an air compressor (or a can of compressed air if necessary). Clean the filter housing, both inside and out, noting how much dirt comes out. Also dry the housing and reassemble everything: if you have removed it, replace the large O-ring and manually fit the filter into the housing, then screw in the lower screw. This procedure will also be useful when you carry out a service.
Updated on 1 April 2026 by ScegliAuto
Video tutorial
Related tutorials
Sportster Iron 883
In this tutorial we can see how to replace the front headlight on the Harley-Davidson Sportster Iron 883, an extremely simple and quick operation. Fi…

Sportster Iron 883
To access the battery on the Harley Davidson Sportster Iron 883, first remove the left side fairing shown in the video, followed by the seat (unscrew…

Sportster Iron 883
To replace the exhaust of the Harley Davidson Sportster Iron 883, you need to loosen the screws that secure the muffler to its housing, so that it ca…
|
How to Reset the Oil Light on a Honda PCX 160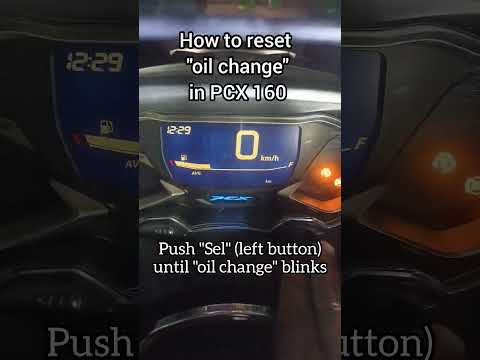
In this mini guide, discover the steps to manually reset the oil light on the central display of your Honda PCX 160. First, turn on the ignition with the key and press both the 'Sel' and 'Set' buttons located below it simultaneously. When the time starts to flash, hold 'Sel' until the oil indicator flashes, then press the 'Set' button once. To complete the reset, hold 'Sel' again until the operation is finished. by ScegliAuto More videos
|
|
For advertising on this site Write to info@scegliauto.com
ScegliAuto is not responsible for any inaccuracy of the data in the lists. To report any inaccuracy or your business (if you own the business in question), please write to info@scegliauto.com
Number of seconds to generate the page: 0.006
(c) ScegliAuto 2026 - info@scegliauto.com - Privacy policy VAT number: IT01247470535 |
