
|
Do it yourself
| |||
| ||||


Stuck injector, how to remove it from the Hyundai Matrix with DIY tools.
Model: Hyundai Matrix
MK 1
- Years:
2001, 2002, 2003, 2004, 2005, 2006, 2007, 2008, 2009, 2010
Video tutorial
On the Hyundai Matrix engine, the removal of a stuck injector is performed with the vehicle turned off, working in a clean and safe manner. Access is cleared by removing necessary covers and components, and the well is carefully cleaned to prevent the entry of impurities. The electrical connector and the diesel return line are disconnected, sealing the ends. After loosening the retaining clip/bracket, the extractor is applied, keeping the line of pull aligned with the injector; before extraction, it is useful to apply penetrating lubricant and apply progressive tension until it is freed. Once extracted, the well hole is sealed, the copper washer is removed and replaced, and the seat is cleaned. Finally, the connections are restored, and the integrity of the wiring and return line is checked in preparation for reassembly or replacement.
Posted on 5 December 2025 by ScegliAuto
Related tutorials
Hyundai Matrix
(2001-2010 /
MK 1)
To replace the door panel on a Hyundai Matrix, first loosen the screw located in the handle housing, then pry it out completely. Next, remove the scr…

Hyundai Matrix
(2001-2010 /
MK 1)
In this video, see where the fuse for the locks is located in a Hyundai Matrix, which is the first thing to check if the locks suddenly stop working.…

Hyundai Matrix
(2001-2010 /
MK 1)
If one or more electrical components of your Hyundai Matrix have suddenly stopped working and you want to check the respective fuses, read this guide…
ScegliAuto offers an extensive international collection of automotive tutorials available in 12 languages. Each guide combines instructional videos with original explanations written by experienced human editors, along with information about the car models covered.
Other guides you may be interested in
|
Where is the battery located on the Aprilia Scarabeo 250ie scooter?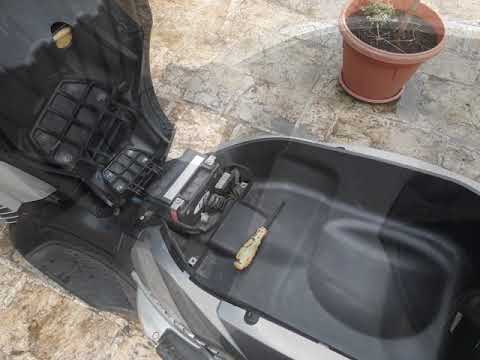
This video shows where the battery is located on the Aprilia Scarabeo 250ie scooter and how to proceed if you need to replace it. As shown, it is located beneath the seat. To access and replace it, first open the seat, then remove the plastic cover by unscrewing the relevant screws with a cross-head screwdriver. Next, disconnect both terminals, starting with the negative, remove the battery from its housing, and install the new replacement following the reverse procedure. by ScegliAuto More videos
|
|
For advertising on this site Write to info@scegliauto.com
ScegliAuto is not responsible for any inaccuracy of the data in the lists. To report any inaccuracy or your business (if you own the business in question), please write to info@scegliauto.com
Number of seconds to generate the page: 0.027
(c) ScegliAuto 2026 - info@scegliauto.com - Privacy policy - About us VAT number: IT01247470535 |
