
|
Do it yourself
| |||
| ||||


What is the Fuse Diagram for the Land Rover Discovery 5?
Model: Land Rover Discovery
L462, MK 5, Discovery 5
- Years:
2017, 2018, 2019, 2020, 2021, 2022, 2023, 2024
Video tutorial
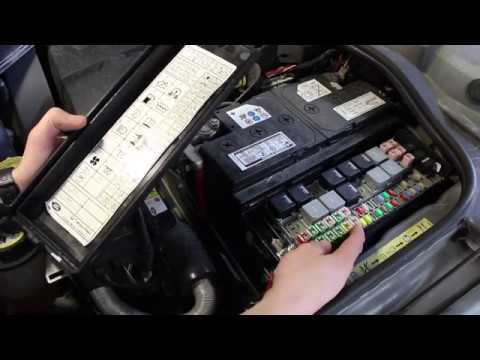
In this video, you can see where the fuse boxes are located in the Land Rover Discovery 5 and their corresponding diagrams, useful if you need to check the fuses of a malfunctioning device. The first box is located inside the cabin, specifically behind the glove compartment on the passenger side. The second box is positioned in the engine compartment, protected by a cover also on the passenger side, while the third and final box is found on the right wall of the trunk. Make sure to replace any blown fuses with replacements that have equivalent specifications.
Updated on 3 October 2026 by ScegliAuto
Related tutorials
Land Rover Discovery
(2017-2024 /
L462, MK 5, Discovery 5)
If a device in your Land Rover Discovery Sport suddenly stops working, first check the status of the respective fuses, which are detailed in this vid…
Land Rover Discovery
(2010-2016 /
MK 4, LR4, Discovery 4)
To disable the electronic parking brake of the Land Rover Discovery, you need to open the hood of the vehicle to access the underlying components. Ne…

Land Rover Discovery
(1998-2004 /
L318, Discovery 2, MK 2)
Replace the fuses located in the dedicated box on a Land Rover Discovery. Open the cover and access the interior; use a plastic trim tool to remove t…
Other guides you may be interested in
|
How to Extract the Spare Wheel from a Mercedes Vito
The spare wheel of a Mercedes Vito is located underneath the vehicle, just below the rear boot. This video demonstrates how to extract the wheel from its compartment. First, open the boot and locate the tools provided with the vehicle to release the wheel; these can be found in a compartment on the right side of the boot. As shown in the video, use the supplied screwdriver to remove the cover cap from the hole where you will insert the socket spanner; this hole is located beneath the rubber seal above the rear bumper. Insert the spanner and attach the extension to allow you to turn it and lower the wheel from under the floor. Finally, detach the pin that allowed the wheel to lower and proceed to extract it from under the vehicle. by ScegliAuto More videos
|
|
For advertising on this site Write to info@scegliauto.com
ScegliAuto is not responsible for any inaccuracy of the data in the lists. To report any inaccuracy or your business (if you own the business in question), please write to info@scegliauto.com
Number of seconds to generate the page: 0.362
(c) ScegliAuto 2026 - info@scegliauto.com - Privacy policy VAT number: IT01247470535 |
