
|
Do it yourself
| |||
| ||||


How to replace the cabin air filter of a Mercedes GLC?
Model: Mercedes Glc
C253, X253, MK 1
- Years 2015-2022
To replace the cabin air filter of a Mercedes GLC, start by opening the hood and locating the engine compartment. The filter is usually located in the rear part of the engine compartment, near the windshield. Once located, remove the cover of the air filter compartment by unscrewing the screws or releasing the fastening clips. After removing the cover, carefully remove the old cabin air filter, noting the orientation and positioning to ensure you insert the new filter correctly. Take the new cabin air filter and insert it into the same housing, making sure it is positioned correctly according to the arrows or indications on the filter itself. Replace the cover of the air filter compartment and make sure to securely fasten it with the screws or fastening clips. Close the hood and check that everything has been reassembled correctly. This procedure will help keep the air inside the cabin clean and free of dust and allergens, improving the air quality for you and your passengers.
Posted on 1 February 2025 by ScegliAuto
Video tutorial
Related tutorials
Mercedes Glc
(2015-2022 /
C253, X253, MK 1)
If you own a Mercedes GLC X253 and want to replace the cabin air filter yourself, all you have to do is read the following guide and follow the proce…

Mercedes Glc
(2015-2022 /
C253, X253, MK 1)
In this new guide aimed at all of you who own a Mercedes GLC 300, we will explain the steps you need to take to replace the cabin air filter yourself…

Mercedes Glc
(2015-2022 /
C253, X253, MK 1)
In the following guide dedicated to all of you who own a Mercedes GLC 300 (year 2015-2022), we will discover the correct procedure to independently c…
Other guides you may be interested in
|
How to reset the tire pressure sensor of the Hyundai Tucson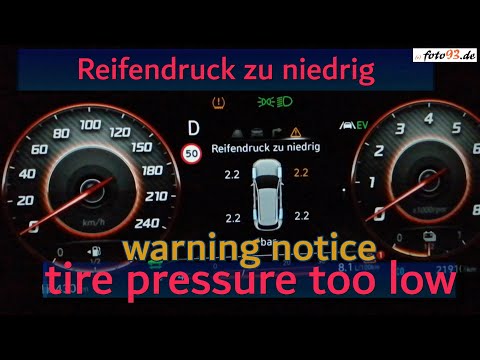
Below we will discover the instructions that will allow us to reset the tire pressure warning light (TPMS) of the Hyundai Tucson. First of all, we get into the car and turn on the instrument panel; then we go to the vehicle settings until we reach the tire pressure monitor, identifying the tire with the incorrect pressure. At this point, we proceed to restore all tire pressures, following the pattern indicated on the label; in this way the TPMS system will be reset and the warning light will be reset by the instrument panel! by ScegliAuto More videos
|

|
For advertising on this site Write to info@scegliauto.com
ScegliAuto is not responsible for any inaccuracy of the data in the lists. To report any inaccuracy or your business (if you own the business in question), please write to info@scegliauto.com
Number of seconds to generate the page: 0.329
(c) ScegliAuto 2026 - info@scegliauto.com - Privacy policy VAT number: IT01247470535 |
