
|
Do it yourself
| |||
| ||||



How to Set the Time on the Mercedes A-Class 180
Model: Mercedes Classe A
W169
- Years:
2004, 2005, 2006, 2007, 2008, 2009, 2010, 2011, 2012
Video tutorial
If you need to change the time and date on this vehicle, follow the instructions below and refer to the tutorial video. First, sit in the driver's seat and turn on the ignition. On the left side of the steering wheel, press the menu button until you select the settings option. Then, use the up and down arrows on the left side of the steering wheel to access the time settings. Adjust the hour using the arrows on the right side of the steering wheel, then select the minutes with the arrows on the left side and scroll through the minutes with the arrows on the right side. To set the new time, press the arrow on the left side of the steering wheel again.
Updated on 22 May 2026 by ScegliAuto
Related tutorials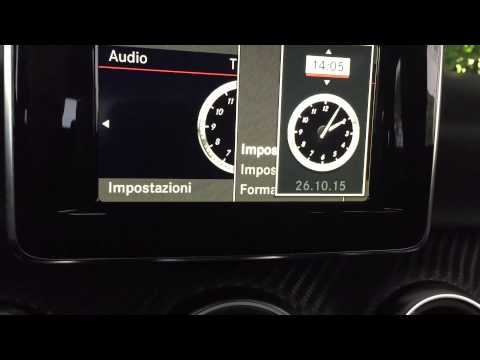
Mercedes Classe A
(2012-2018 /
W176)
In this video tutorial, you can see how to set the time and date on the Mercedes A-Class by following a few simple steps. First, open the door of you…

Mercedes Classe A
(2012-2018 /
W176)
These brief and simple instructions will show you how to change the time and date on a Mercedes A-Class. First, get in the vehicle and turn on the in…

Mercedes Classe A
(2004-2012 /
W169)
Today we will see the information that will allow us to adjust the date and time of the Mercedes Classe A. First of all, we get on board the car and …
ScegliAuto offers an extensive international collection of automotive tutorials available in 12 languages. Each guide combines instructional videos with original explanations written by experienced human editors, along with information about the car models covered.
Other guides you may be interested in
|
Replacing the Glow Plugs on the Fiat Ducato 2.3 Multijet
Today, we will go through the main instructions to remove and replace the glow plugs on the Fiat Ducato 2.3 Multijet. First, open the bonnet of the vehicle and begin by removing the front bumper; to access the glow plugs, it will also be necessary to remove the cooling radiator and the intercooler by unscrewing the bracket bolts and disconnecting the various pipes. Now disconnect the connectors from the glow plugs and use a socket wrench with an extension to unscrew and remove them, replacing them with new original ones. by ScegliAuto More videos
|
|
For advertising on this site Write to info@scegliauto.com
ScegliAuto is not responsible for any inaccuracy of the data in the lists. To report any inaccuracy or your business (if you own the business in question), please write to info@scegliauto.com
Number of seconds to generate the page: 0.032
(c) ScegliAuto 2026 - info@scegliauto.com - Privacy policy - About us VAT number: IT01247470535 |
