
|
Do it yourself
| |||
| ||||


Mercedes Classe E - Video tutorial
Model: Mercedes Classe E
W124
- Years 1984-1995 First of all, the car must be lifted using a jack (to be applied in correspondence with the wheel on which it is to be used) or a lift. Once the car has been raised, disassemble the wheel fixing pins using a pneumatic screwdriver and remove the wheel itself: it is possible to immediately notice the wear of the disc and the considerable reduction in thickness. At this point, locate the two holes on the brake calliper and with the aid of a pin punch and hammer, extract the fixing pins of the pads and the sealing spring. With an expansion caliper, space the pads so that the piston is fully retracted and create the accommodation for the new pads which, clearly, will have a much greater thickness. Loosen the two pins securing the rear brake caliper and remove it so that the disc can be freely extracted. The disc is fixed to the hub by means of a hexagonal head pin positioned near one of the threaded holes for the wheel fixing pins: once the hexagonal pin has been loosened it is possible to remove the disc and note the presence of the jaws (in the case of the car in question, in fact, the disc also acts as a drum). Before positioning the new disc, however, it is advisable to clean the hub of any oxidation residues (with sandpaper or a wire brush), to apply grease to prevent the new formation of rust and to clean the disc itself with solvent. to eliminate any residues of passivating oil (it is an oil that is applied by the manufacturer to prevent the discs from oxidizing during the period of storage in the warehouse). Once the new disc has been applied, center the threaded hole on the hub and carefully tighten the hexagonal fixing pin. At this point, reposition the caliper and tighten the relative fixing pins. Insert the new pads (having, if necessary, previously treated with a specific anti-adhesive spray) and, after having carefully brushed them, insert the upper pin, then the sealing spring (under the pin) and the lower pin. Finally, using a pin punch and a hammer, knock the pins down to allow them to be properly anchored. Reposition the wheel, lock the fixing pins with the pneumatic screwdriver and, after lowering the car, recheck the tightness with the dynamomotive wrench. Remember to pump on the brake pedal until it opposes the right resistance to reposition the brake caliper actuating piston and clearly to pay attention to the first braking as a minimum of running-in will be necessary before obtaining maximum efficiency from the newly overhauled braking system.
Posted on 23 June 2023 by ScegliAuto
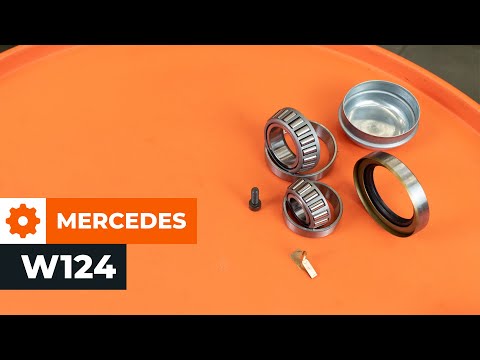 How to replace the front wheel bearing of a Mercedes W124.
Mercedes Classe E (1984-1995 / W124) Replacing the front wheel bearing of the Mercedes E-Class, model W124, is a very simple operation. You just need to follow our tips and the following  How to replace the rear wheel of a Mercedes E-Class
Mercedes Classe E (1984-1995 / W124) Before we can start, we will have to get out of the cockpit of our Mercedes E-Class. Let's start by lifting the rear of the car, using the jack provi 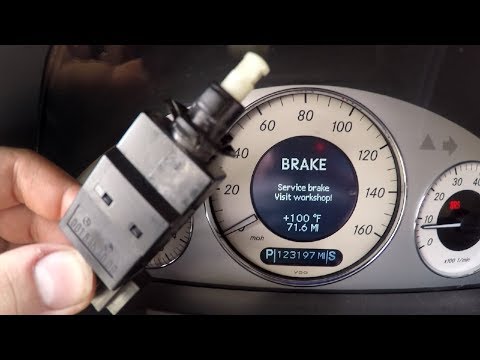 How to replace the brake pedal switch on the Mercedes E-Class?
Mercedes Classe E (2002-2009 / W211) In order to replace the brake pedal switch on the Mercedes E-Class you have to remove the plastic panel that is located between the steering column a Other guides that may interest you
|
Frequently Asked QuestionsHow do you open the fuel flap of the Volkswagen Golf 5?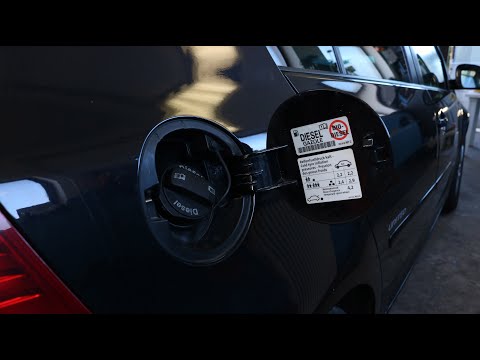
In order to open the fuel flap of the Volkswagen Golf 5, you need to press the appropriate button inside the passenger compartment, which is located in the rear part of the glove box on the driver's door. By pressing the button, the flap will unlock and it will then be possible to open it manually. Once the flap has been opened, the fuel tank access cap must be unscrewed. To close everything again, it will be sufficient to screw the tank cap again; subsequently, the flap must also be closed, pressing it so that it fits thanks to its locking mechanism. by ScegliAuto More videos
|
|
For advertising on this site Write to info@scegliauto.com
ScegliAuto is not responsible for any inaccuracy of the data in the lists. To report any inaccuracy or your business (if you own the business in question), please write to info@scegliauto.com
Number of seconds to generate the page: 0.070
(c) ScegliAuto 2024 - info@scegliauto.com - Privacy Policy VAT number: IT01247470535 |