
|
Do it yourself
| |||
| ||||



Video tutorial
Here’s how to replace the Vanos solenoid valve (in this case, the exhaust one) on a Mini Cooper R56 with an N18 engine: common symptoms include loss of power, increased fuel consumption, unstable idle, and sluggish acceleration. The most common error codes are P0548, P13C9, 2A7A, or 2A7B. You can attempt to clean the solenoid with electrical contact cleaner, but if the error returns, replacement is necessary. The two Vanos solenoids are located on the right side of the engine (when viewed from the front of the car) near the oil dipstick. The exhaust solenoid is the outer one, while the inner one is near the intake manifold. Disconnect the electrical connector and remove the T30 fixing screw: place a cloth under the solenoid to catch any oil that may spill and to prevent the solenoid or screw from falling into the engine bay! Clean the solenoid housing and lubricate the o-ring of the new solenoid (which is recommended to be purchased from a local parts supplier, as online you mainly find intake valves). Refit the screw and reconnect it. The torque setting is light, 8/10 Nm. After replacement, clear the error codes from the ECU, check the oil level, and take it for a test drive.
Posted on 10 August 2026 by ScegliAuto
Related tutorials
Mini
(2007-2014 /
R56, R57, R55)
The VANOS is a variable valve timing system installed on the engine of the Mini Cooper and other car models. To replace it, you need to loosen the bo…

Mini
(2007-2014 /
R56, R57, R55)
If you don't know where the OBD port of your Mini Cooper R56 is located, don't worry because thanks to the steps described in the following guide, yo…
Mini
(2007-2014 /
R56, R57, R55)
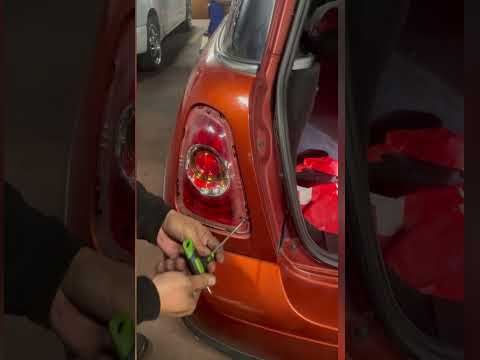
If you need to remove one of the rear headlamps from your Mini Cooper R56 but don't know how, don't worry as we will explain step by step how to comp…
Other guides you may be interested in
|
How to Open the Bonnet of the Toyota C-HR?
In this tutorial, you will learn how to open the bonnet of the Toyota C-HR, a very simple operation that follows the typical procedure for most vehicles. First, unlock the catches using the remote button, then open the driver's door, locate the lever in the lower left area of the dashboard, and pull it. Next, move to the front of the vehicle, locate the second lever, push it to the left, and simultaneously lift the bonnet. To close it, simply let it drop gently. by ScegliAuto More videos
|
|
For advertising on this site Write to info@scegliauto.com
ScegliAuto is not responsible for any inaccuracy of the data in the lists. To report any inaccuracy or your business (if you own the business in question), please write to info@scegliauto.com
Number of seconds to generate the page: 0.022
(c) ScegliAuto 2026 - info@scegliauto.com - Privacy policy VAT number: IT01247470535 |
