
|
Do it yourself
| |||
| ||||


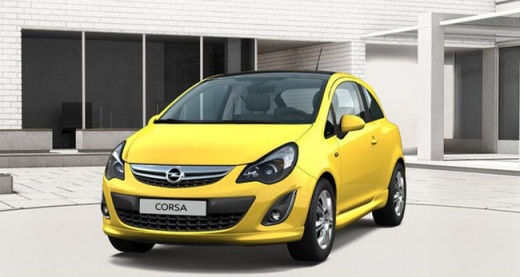
How to Install a Reversing Camera on an Opel Corsa D
Model: Vauxhall Corsa
Corsa D
- Years:
2006, 2007, 2008, 2009, 2010, 2011, 2012, 2013, 2014
Video tutorial
Let’s see how to install a reversing camera on an Opel Corsa D: first, you need to remove the radio using the appropriate keys. Disconnect all electrical connectors from the back of the radio. The pink wire between the Android radio socket and the CAN bus decoder can be used to power the reversing camera. Connect it and check the connection with a voltmeter. Now, open the compartment on the right side of the boot. Connect the reversing camera to the reverse light. All you need to do is connect the black wire (negative) to the black wire from the rear light socket and the red positive to the blue and grey wires. You can use the connectors shown in the video to connect the wires. Route the reversing camera wires under the dashboard. Ensure they do not touch the pedals, hiding them under the plastic thresholds to the boot. Now pass it through the number plate hole to connect it to the car's wiring. In the reversing camera package, there were two screws that we will use to secure it in place. Now, connect the two yellow plugs to the red wires connecting the reversing camera. Use insulating tape to prevent accidental disconnections of the cables. Join the pink wire to the red one using the connector. You can now refit the radio.
Updated on 25 June 2026 by ScegliAuto
Related tutorials
Vauxhall Corsa
(2006-2014 /
Corsa D)
Let’s see how to replace the old head unit in an Opel Corsa 'D' version with a 2 DIN radio. Start by removing the old head unit using the appropriate…

Vauxhall Corsa
(2000-2006 /
Corsa C)
In this video, we see why the reverse gear won't engage in an Opel Corsa. Simply remove the gear knob and observe that all gears engage except for re…

Vauxhall Corsa
(2000-2006 /
Corsa C)
Installing a new radio in an Opel Corsa C is a straightforward task that can be done independently, aided by our brief video tutorial. Start the repl…
Other guides you may be interested in
|
How to Open the Bonnet on the Mitsubishi L200?
In this tutorial, you will see how to open the bonnet on the Mitsubishi L200, a very simple operation that follows the standard procedure. First, open the vehicle and go to the driver's side, then locate the lever at the lower outer area, just in front of the pedals, and pull it. Next, position yourself in front of the bonnet, locate the second lever above the Mitsubishi logo, and push it to the right, releasing the latch. At this point, you can fully lift the bonnet and secure it with the prop rod. by ScegliAuto More videos
|
|
For advertising on this site Write to info@scegliauto.com
ScegliAuto is not responsible for any inaccuracy of the data in the lists. To report any inaccuracy or your business (if you own the business in question), please write to info@scegliauto.com
Number of seconds to generate the page: 0.105
(c) ScegliAuto 2026 - info@scegliauto.com - Privacy policy VAT number: IT01247470535 |
