
|
Do it yourself
| |||
| ||||


How to Replace the Heat Exchanger in a Peugeot 208 1.5 Diesel
Model: Peugeot 206
MK 1
- Years:
1998, 1999, 2000, 2001, 2002, 2003, 2004, 2005, 2006, 2007, 2008, 2009
This video is currently unavailable
This short video tutorial explains what happens when the heat exchanger fails in a car and illustrates the procedure for replacing the part in a Peugeot 208 1.5 diesel. When the heat exchanger breaks, engine oil enters the water circuit (and thus the cooling system). In this case, access the heat exchanger by lifting the car and removing it, draining any traces of fluid, and thoroughly cleaning the entire circuit using the appropriate product. Finally, you can replace the old heat exchanger with a new one.
Updated on 6 April 2026 by ScegliAuto
Related tutorials
Peugeot 206
(1998-2012 /
MK 1)
The fuse boxes of the Peugeot 206 1.9 diesel, specifically the containers where you will find all the fuses used in the car, are located in two diffe…
Peugeot 206
(1998-2012 /
MK 1)
There is an indirect method to check the efficiency of the injectors by monitoring the amount of diesel recovered: if the injectors are functioning a…

Peugeot 206
(1998-2012 /
MK 1)
In this tutorial we can see how to replace the alternator in the Peugeot 206 with diesel power, a simple operation that requires good manual skills. …
ScegliAuto offers an extensive international collection of automotive tutorials available in 12 languages. Each guide combines instructional videos with original explanations written by experienced human editors, along with information about the car models covered.
Other guides you may be interested in
|
Frequently Asked QuestionsHow to Replace the Front Headlight Bulb on the Nissan Micra K12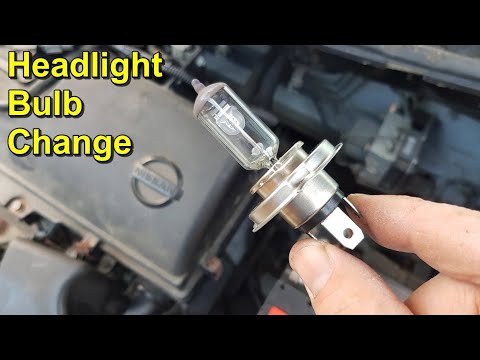
With this mini guide, you will be able to replace the front headlight bulb on your Nissan Micra K12 (2002-2010) in just a few minutes and safely. First, turn off the car completely and disconnect the battery to eliminate any potential risk to your safety. Next, disconnect the electrical connector and remove the protective cap. Finally, take out the faulty bulb and replace it with a new compatible one. Reassemble the various components (including the battery) and the procedure is complete. by ScegliAuto More videos
|
|
For advertising on this site Write to info@scegliauto.com
ScegliAuto is not responsible for any inaccuracy of the data in the lists. To report any inaccuracy or your business (if you own the business in question), please write to info@scegliauto.com
Number of seconds to generate the page: 0.044
(c) ScegliAuto 2026 - info@scegliauto.com - Privacy policy - About us VAT number: IT01247470535 |
