
|
Do it yourself
| |||
| ||||


How to reset the service light on the 2018 Renault Scenic
Model: Renault Scenic
MK IV, Scenic 4, MK 4, Scenic IV
- Years 2016-2022
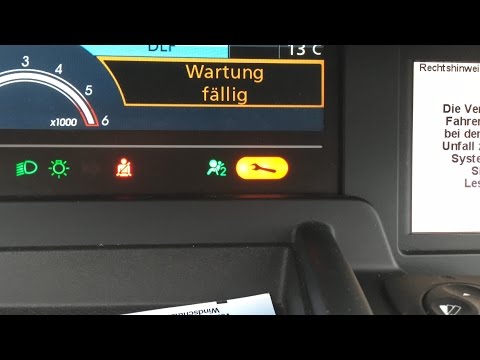
If you own a fourth series Renault Scenic (year 2018) and want to manually reset the service light that remains on the instrument panel, simply read the following guide carefully and follow the various steps. First, reach the driver's seat and turn on the dashboard, then scroll through the various screens using the directional button with the down arrow. Once you have found the "Service intervals" option, hold down the "OK" button until a new screen appears. Finally, press the "OK" button again and wait for the reset of the light to be completed.
Posted on 14 August 2025 by ScegliAuto
Video tutorial
Related tutorials
Renault Scenic
(2016-2022 /
MK IV, Scenic 4, MK 4, Scenic IV)
Let's see the process that will allow us to reset the service light for the regular maintenance of the engine oil change in the Renault Scenic. First…
Renault Scenic
(2016-2022 /
MK IV, Scenic 4, MK 4, Scenic IV)
To reset the Service light on the Renault Scenic 4, turn on the instrument cluster by rotating the ignition key in the ignition switch. Once the disp…

Renault Scenic
(2009-2015 /
Scenic 3, MK 3, MK III, Scenic III)
It will be possible to reset the Service light on the instrument panel of the Renault Scenic by turning on the instrument panel, inserting the igniti…
Other guides you may be interested in
|
How to Replace the Remote Battery for the Volvo XC40?
In this tutorial, you will see how to replace the battery in the remote for the Volvo XC40, a very simple and quick operation. For this, you will need a replacement battery of type CR2032 and possibly a small flathead screwdriver. First, remove the front cover by pressing the button on the metal ring, then locate the second button, press it as well, and remove the opposite cover. Next, open the circular cap, take out the old battery, and insert the new one in the opposite direction. Finally, reassemble everything. by ScegliAuto More videos
|
|
For advertising on this site Write to info@scegliauto.com
ScegliAuto is not responsible for any inaccuracy of the data in the lists. To report any inaccuracy or your business (if you own the business in question), please write to info@scegliauto.com
Number of seconds to generate the page: 0.264
(c) ScegliAuto 2026 - info@scegliauto.com - Privacy policy VAT number: IT01247470535 |
