
|
Do it yourself
| |||
| ||||



How to change the rear shock absorbers of the Renault Scenic
Model: Renault Scenic
MK III, Scenic III, Scenic 3, MK 3
- Years:
2009, 2010, 2011, 2012, 2013, 2014, 2015
Video tutorial
On the Renault Scénic 3, the work starts from the rear wheel: in the video, you can see the loosening of the bolts with a wrench, then the car is lifted and the wheel is removed to provide access to the suspension. With the wheel removed, the rear shock absorber of the Renault Scénic 3 is clearly visible and work is done on its fixings. The removal is done by acting on the lower anchoring point: the nut/bolt is unscrewed and the shock absorber is freed from its seat, taking care not to stress the nearby parts while pulling it out. Halfway through the procedure, the new shock absorber is also shown, ready to be installed in place of the old one. For reassembly, on the Renault Scénic 3, the new shock absorber is positioned in the same direction and reinserted into its fixing points. The nuts are put back and everything is tightened. Once the tightening is completed, the wheel is reattached to the Renault Scénic 3, the car is lowered to the ground, and a final visual check is done to ensure everything is in place and that the fixings are well tightened.
Posted on 17 January 2026 by ScegliAuto
Related tutorials
Renault Scenic
(2003-2009 /
Scenic 2, MK 2)
Today, you will learn how to remove and replace the rear shock absorbers on a second series Renault Scenic by following these simple steps. First, li…
Renault Scenic
(2009-2015 /
MK III, Scenic III, Scenic 3, MK 3)
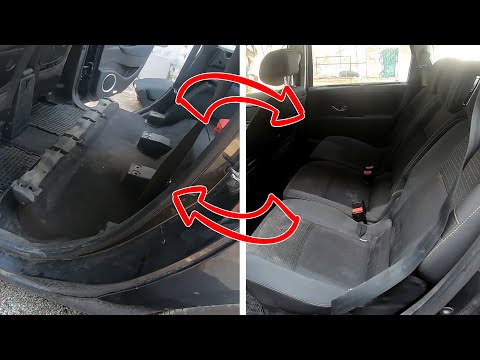
This guide will show you how to remove and possibly repair or replace the rear seats of a Renault Scenic. First, open the rear doors of the vehicle a…

Renault Scenic
(2003-2009 /
Scenic 2, MK 2)
Let's see how to remove the rear seats from a Renault Scenic. In this guide, we will lower and remove the rear seats to create space in the boot. Mov…
Other guides you may be interested in
|
How to Remove the Toll Tag Holder from the Car Windscreen
The toll tag holder is usually attached to the car windscreen to ensure that the toll tag functions immediately when passing through barriers. However, if you decide to remove the holder, you should follow this procedure: - Insert the toll tag into the holder; - Pull the holder inwards to detach it from the windscreen; you can use a glass scraper or a stiff plastic card to assist you; After removing the holder, it is essential to remove the adhesive from the windscreen. To remove the adhesive, we recommend using a solvent-based spray that will remove the glue without clouding the area. by ScegliAuto More videos
|
|
For advertising on this site Write to info@scegliauto.com
ScegliAuto is not responsible for any inaccuracy of the data in the lists. To report any inaccuracy or your business (if you own the business in question), please write to info@scegliauto.com
Number of seconds to generate the page: 0.028
(c) ScegliAuto 2026 - info@scegliauto.com - Privacy policy VAT number: IT01247470535 |
