
|
Do it yourself
| |||
| ||||


Use of the tire pressure monitoring system on the Renault Zoe
Model: Renault Zoe
MK 1
- Years 2013-2024
In this video we can see that the tire pressure monitoring system (TPMS) is always active on the Renault Zoe, warning if the pressure drops or is insufficient. A dedicated warning light appears on the instrument panel if the pressure drops below a certain limit, and it is therefore necessary to check the pressure on all four tires, a task to be done with cold tires. The reference values can be found on the thickness of the door on the left side. Once the pressure has been adjusted, the warning light will turn off on its own after driving for a few minutes. It is possible to reset the pressure reference values to adjust them to specific values of use. To perform a reset, we must have the ignition on and press one of the buttons located on the lever satellite on the right side of the steering wheel, until selecting the desired function, then hold down the button for about three seconds to start the reset; in the meantime the warning light flashes, then stops to indicate that the reset has occurred, and the warning light will disappear after a few minutes of driving. If the warning light flashes and then the wrench light comes on, it means there is a malfunction in the TPMS system.
Posted on 27 June 2024 by ScegliAuto
Video tutorial
Related tutorials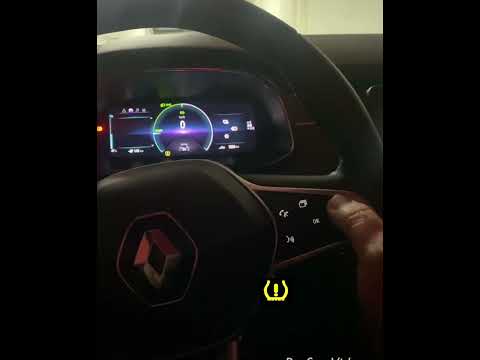
Renault Zoe
(2013-2024 /
MK 1)
This guide will show you how to reset the tyre pressure light on the Renault Zoe; before performing the reset, ensure that all four tyres are at the …

Renault Zoe
(2013-2024 /
MK 1)
Today, learn how to adjust the tyre pressure on a Renault Zoe vehicle. Adjusting the tyre pressure is a fundamental task before embarking on a journe…

Renault Zoe
(2013-2024 /
MK 1)
Following these brief and simple steps, we will see the procedure for resetting the tire pressure warning light on the Renault Zoe; before resetting …
Other guides you may be interested in
|
How to Adjust the Brightness of the Instrument Cluster on a Peugeot 3008?
To adjust the brightness of the instrument cluster on a Peugeot 3008, you need to turn on the ignition and access the settings via the menu located in the central area of the dashboard. In the screen that appears, select the "Display Configuration" option: now, by selecting the "Brightness" option, you can adjust it using the dedicated slider that will appear on the screen. The adjustment should be made with the headlights on as well as with them off. Once the adjustment is complete, you can turn off the instrument cluster. by ScegliAuto More videos
|
|
For advertising on this site Write to info@scegliauto.com
ScegliAuto is not responsible for any inaccuracy of the data in the lists. To report any inaccuracy or your business (if you own the business in question), please write to info@scegliauto.com
Number of seconds to generate the page: 0.262
(c) ScegliAuto 2026 - info@scegliauto.com - Privacy policy VAT number: IT01247470535 |
