
|
Do it yourself
| |||
| ||||


What is the Smart Fortwo 450 fuse diagram?
Model: Smart Smart
450
- Years 1998-2007
In the Smart Fortwo 450, the first series, there are two fuse boxes, one located under the dashboard on the driver's side and the other under the seat, also on the driver's side. In the main fuse box, i.e. that of the dashboard, there are the fuses of most of the devices, for example high beam, low beam, daytime running lights, indicators, car radios, interior lights, window lifters, wipers etc. In the secondary box, on the other hand, there are the fuses relating to the engine and the fuel system, for example that relating to the fuel pump, the starter motor, the air conditioning compressor, etc.
Posted on 3 October 2021 by ScegliAuto
Video tutorial
Related tutorials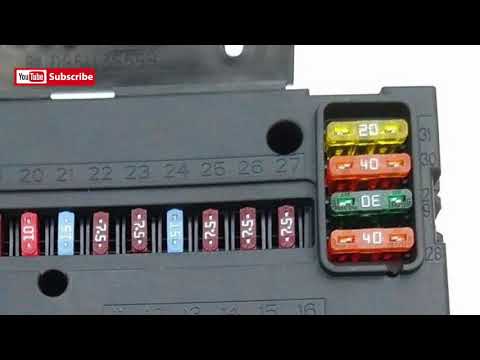
Smart
(1998-2007 /
450)
Let's see in this short and simple guide the positioning of the fuse boxes, together with their diagram, on the Smart Fortwo 450 and 451. First of al…
Smart
(1998-2007 /
450)
In this guide we will see the placement of fuse boxes on a Smart Fortwo 450, first series, along with the fuse diagram. First of all, let's identify …
Smart
(1998-2007 /
450)
Let's briefly see the main steps useful for finding the fuse box of the Smart Fortwo; we will also see how to find the fuse diagram and chart. First,…
Other guides you may be interested in
|
Frequently Asked QuestionsHow to Remove the Centre Console on a Renault Scenic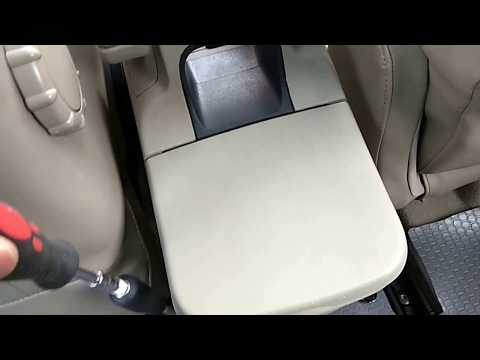
Watch this video to learn how to remove the glove compartment from the rear cover of the centre console on a Renault Scenic. Use a plastic lever to pry at the edge of the side plastics as shown in the video. Once the plastics are removed, unscrew the screws located at the sides of the centre console with a suitable screwdriver, and disconnect all the power connectors. Remove the side rests from the glove compartment. Fit the new piece onto the centre cover and proceed with the assembly of the remaining parts, working in reverse order. by ScegliAuto More videos
|
|
For advertising on this site Write to info@scegliauto.com
ScegliAuto is not responsible for any inaccuracy of the data in the lists. To report any inaccuracy or your business (if you own the business in question), please write to info@scegliauto.com
Number of seconds to generate the page: 0.158
(c) ScegliAuto 2026 - info@scegliauto.com - Privacy policy VAT number: IT01247470535 |