
|
Do it yourself
| |||
| ||||


Toyota Aygo - Video tutorial
Model: Toyota Aygo
MK 1, Ab10
- Years 2005-2014 Today we will see, in this video tutorial, how to disassemble and replace the front light of the Toyota Aygo, in simple and quick steps. First of all, we open the bonnet of our car and start unscrewing the fixing screws of the front bumper, located both at the top and at the bottom; then unscrew the additional screws located on both sides of the wheel arches, using a Phillips screwdriver. At this point we gently unclip the bumper on the sides, until it is completely removed; unscrew the screws of the headlight and disconnect the electrical connector of the bulbs to remove it and replace it with the new one!
Posted on 16 May 2024 by ScegliAuto
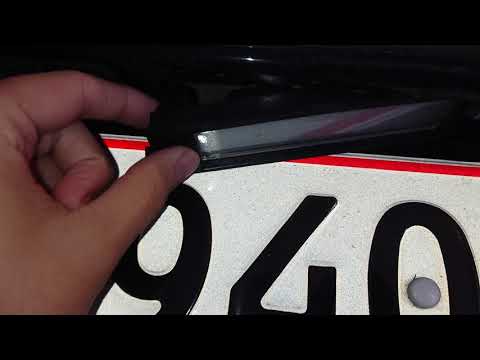 How to replace Toyota Aygo license plate lights
Toyota Aygo (2014-2023 / Ab40, MK 2) Let's find out below the guide that will allow us to disassemble and replace the Toyota Aygo license plate lights, by following these simple steps. F 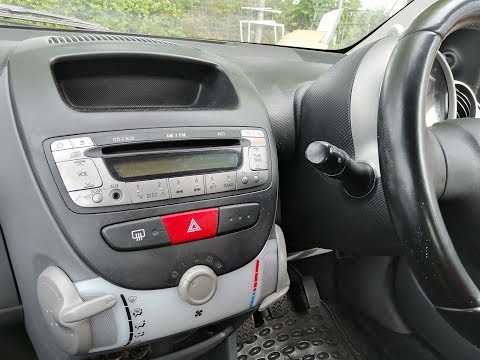 How to disconnect Toyota Aygo car stereo
Toyota Aygo (2005-2014 / MK 1, Ab10) How to disassemble the radio of our Aygo? Let's see the disassembly of the radio and the assembly of the new one on Toyota Aygo. Disassemble the air  How to replace the front headlight of the Toyota Aygo
Toyota Aygo (2005-2014 / MK 1, Ab10) In this guide, we will see step-by-step instructions on how to disassemble and replace the front headlight of the Toyota Aygo, as well as the Citroen Other guides that may interest you
|
How to reset the Renault Master AdBlue warning light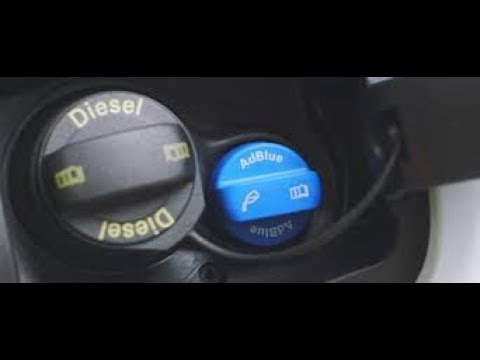
If when you turn on the ignition you see a strange warning relating to AdBlue, do not worry because it is nothing serious. Everything is solved in a few minutes and with a very low cost. In fact, it is a particular additive used in Diesel engines to reduce the environmental impact. Before continuing with the various steps it is therefore necessary to purchase a tank of AdBlue. Furthermore, all the various operations must be carried out with the engine off. The AdBlue tank is located on the passenger side, between the door and the tailgate. Unscrew the blue cap present and pour in the new AdBlue with the help of a rubber hose or an appropriate funnel. Once this is done, you can close the tank and the flap. Switch on the ignition again and the warning light has disappeared. by ScegliAuto More videos
|
|
For advertising on this site Write to info@scegliauto.com
ScegliAuto is not responsible for any inaccuracy of the data in the lists. To report any inaccuracy or your business (if you own the business in question), please write to info@scegliauto.com
Number of seconds to generate the page: 0.052
(c) ScegliAuto 2024 - info@scegliauto.com - Privacy Policy VAT number: IT01247470535 |