
|
Do it yourself
| |||
| ||||


Replacing the headlight bulb on a Scania R370
Model: (Various brands) Various
To replace the low beam bulb of a Scania R370, we must first open the lower section of the central grille, the one that bears the inscription "R370". Using a Torx type screwdriver, undo the two screws on the right side of the light. We have to loosen two more screws, one above and one below the headlight, at the height of the edge that separates the headlight from the direction indicator. We can thus rotate the headlight unit, which in the rear part has a cover fixed with a screw, once removed we will have access to the bulb holder. We disconnect the electrical connections and release the spring that stops the lamp, so that we can remove it and replace it with a new one, being careful not to touch the bulb with bare hands. Repeat the previous operations in reverse and before fixing the lighthouse, check its correct functioning.
Posted on 28 September 2024 by ScegliAuto
 How to replace the front headlight bulbs in the Scania G 450 truck?
(Various brands) Various In this tutorial, we can see how to replace the front headlight bulbs in the Scania G450 truck, a very simple and quick operation. First of all, make  Replacing the front light bulb on Scania R450
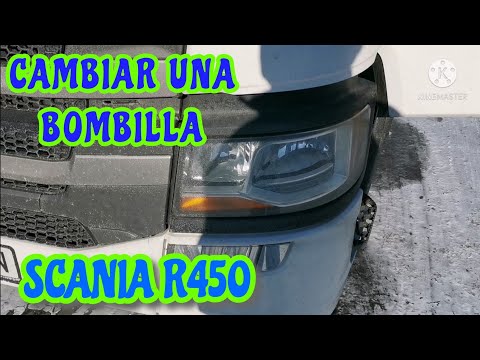
(Various brands) Various Open the front protective door so that you can access the headlight. Unscrew the three torx screws that secure the light: two are located in the cent  Where is the fuse box located for the Scania R series?
(Various brands) Various The Scania R series has only one fuse box inside. The box contains all the fuses related to the van's instrumentation. Specifically, it is located in Other guides that may interest you
|
How to deactivate the safe lock on a Volkswagen Golf.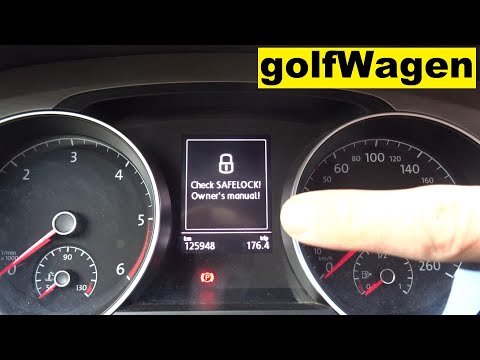
The safe lock is indeed an anti-theft system that prevents thieves from accessing the car. This device locks the doors, both externally and internally, when the driver activates the central locking remote control after leaving the vehicle. To permanently disable it, it is necessary to use a diagnostic program such as VCDS that we will connect to the vehicle through the ODBII port. Then wait for the connection and recognition of the control unit and then select the blocks present and locate the safe lock to disable it. And the job will be completed. by ScegliAuto More videos
|
|
For advertising on this site Write to info@scegliauto.com
ScegliAuto is not responsible for any inaccuracy of the data in the lists. To report any inaccuracy or your business (if you own the business in question), please write to info@scegliauto.com
Number of seconds to generate the page: 0.077
(c) ScegliAuto 2024 - info@scegliauto.com - Privacy Policy VAT number: IT01247470535 |