
|
Do it yourself
| |||
| ||||


Replacement of Front Bumper
Model: Volkswagen Golf
Golf IV, MK 4, Golf 4
- Years 1997-2003
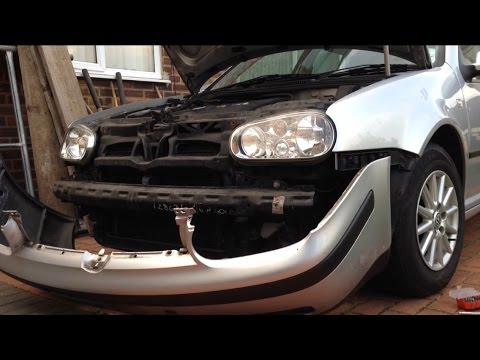
This tutorial explains how to remove and/or install the front bumper on a Golf. First, remove the panel with the integrated badge attached to the bumper using side bolts. Additionally, unlock a central clip by pressing on it with the tip of a screwdriver. At this point, remove all the bolts and clips securing the bumper to the vehicle: there are many attachment points, some of which are well hidden (especially those near the wheel arch). To mount or dismount the bumper, it is best to grip it from the centre; to do this, remove the small central grille attached with two clips. With the bumper removed, it is easier to replace the front headlights if necessary.
Updated on 12 February 2026 by ScegliAuto
Video tutorial
Related tutorials
Volkswagen Golf
(2012-2019 /
Golf VII, MK 7, Golf 7)
The steps outlined in this guide will allow us to dismantle and replace the front bumper of the Volkswagen Golf. First, we open the hood of the car a…

Volkswagen Golf
(2008-2012 /
MK 6, Golf VI, Golf 6, 5K1)
Is the front bumper of your car damaged? Here’s how to replace it. Lift the front bonnet and secure it. Using a screwdriver, remove the screws locate…
Volkswagen Golf
(1997-2003 /
Golf IV, MK 4, Golf 4)
Replacing the front bumper on the Golf 4? Not sure how to do it? Unscrew the fastening bolts located at the top of the bumper (after removing the fro…
Other guides you may be interested in
|
How to Connect the Cables to the Battery of the Citroen Xsara Picasso?
In this tutorial, you will see how to connect the cables to the battery of the Citroen Xsara Picasso, useful if you need to recharge it or perform an emergency start. First, ensure the key is not inserted, then open the bonnet and move to the front of the left headlamp. Next, locate the bolt just behind the filter box and connect the positive terminal clamp to it. Now you can connect the negative terminal to any point on the chassis, such as the indicated point. Once the operation is complete, ensure you disconnect the negative first and then the positive. by ScegliAuto More videos
|
|
For advertising on this site Write to info@scegliauto.com
ScegliAuto is not responsible for any inaccuracy of the data in the lists. To report any inaccuracy or your business (if you own the business in question), please write to info@scegliauto.com
Number of seconds to generate the page: 0.192
(c) ScegliAuto 2026 - info@scegliauto.com - Privacy policy VAT number: IT01247470535 |
