
|
Do it yourself
| |||
| ||||


|
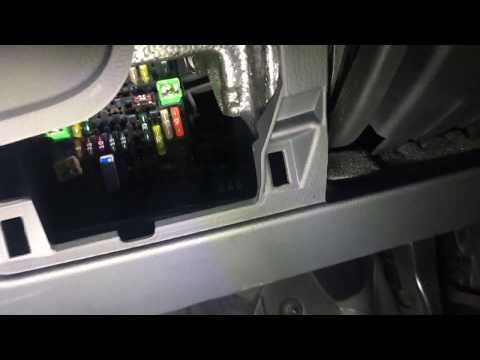
Thanks to this short video tutorial we can see where the two fuse boxes are located, and also view all the related fuse diagrams on a third generation Audi A3 produced from 2012 to 2019. So the first fuse box is located behind a small plastic panel located to the left and under the steering wheel, inside the passenger compartment of the vehicle. To reach the second fuse box instead, which is located inside the engine compartment, we must first open the hood, pulling the appropriate release lever, and here we will find the fuse box on our right.
Posted on 9 November 2022 by ScegliAuto
Video tutorial
Related tutorials
Audi A3
(2012-2019 /
MK 3, 8V)
These brief instructions will allow us to discover the positioning and diagram of the fuse boxes of the Audi A3. First, we open the passenger side gl…
Audi A3
(2012-2019 /
MK 3, 8V)
In this video tutorial we will see the placement and diagram of the fuses of the Audi A3, following the instructions below. First we open the driver'…

Audi A3
(2020-2026 /
8Y, MK 4)
In this video we can see the diagram of the fuses, and the position of the relative boxes, in the Audi A3 8Y, useful in case a device is malfunctioni…
Other guides you may be interested in
|
Frequently Asked QuestionsRemoval and Replacement of Mini Headlamp Washers
To remove and replace the headlamp washers on a Mini, proceed as follows: 1) Open the engine bay. 2) Disconnect the battery. 3) Remove the four bolts securing the headlamp to the car's frame, taking care of the different lengths of the bolts. 4) Gently lift the headlamp unit, remembering to disconnect the electrical connection and the rubber hose of the washer. 5) Remove and replace the washer using the two screws from the headlamp unit. 6) To reinstall the components, proceed in reverse, ensuring the correct positioning of all screws and electrical/hydraulic connections. by ScegliAuto More videos
|

|
For advertising on this site Write to info@scegliauto.com
ScegliAuto is not responsible for any inaccuracy of the data in the lists. To report any inaccuracy or your business (if you own the business in question), please write to info@scegliauto.com
Number of seconds to generate the page: 0.147
(c) ScegliAuto 2026 - info@scegliauto.com - Privacy policy VAT number: IT01247470535 |