
|
Do it yourself
| |||
| ||||


How to Change the Radiator on a BMW E46
Model: BMW Serie 3
E46
- Years 1998-2006
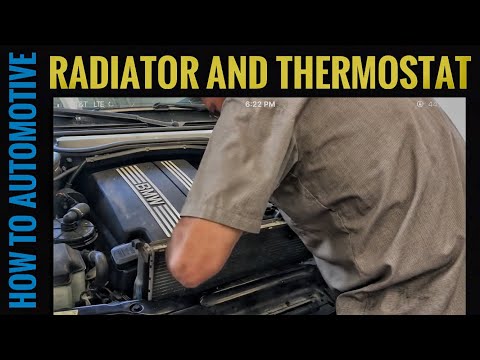
Open the hood and identify the components that need to be removed before replacing the radiator. These include the plastic cover above the radiator and the duct that brings air to the cabin. Now, drain the coolant from the radiator into a container placed underneath it. Next, disconnect the various hoses that carry coolant from the reservoir to the radiator and engine by removing the clips with a screwdriver, and take them off along with the reservoir itself. Now remove the radiator fan (after disconnecting the electrical supply) using the appropriate wrench to unscrew the bolt on the shaft and unscrewing the various bolts shown in the images. We are now at the final step, which is removing the radiator. Disconnect the two hoses found at the bottom (to the right and left of the radiator) and unscrew the bolts indicated in the images that secure the radiator in place. Once removed, you can detach the necessary piece for the various hose connections from it. To install the new radiator, simply reverse the steps shown in the images.
Updated on 1 March 2026 by ScegliAuto
Video tutorial
Related tutorials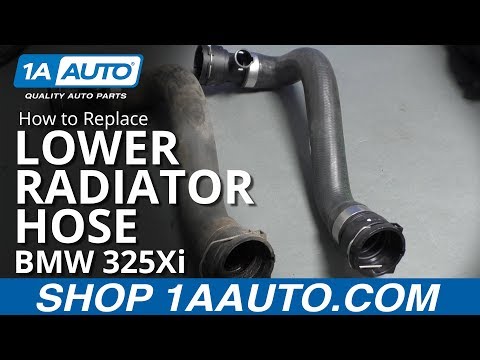
BMW Serie 3
(1998-2006 /
E46)
In this video tutorial we will see how to remove and replace the lower radiator or coolant hose on the BMW 3 Series E46 (325 Xi). First we open the e…

BMW Serie 3
(1998-2006 /
E46)
Let's see in this guide how to remove and replace the internal radiator of the passenger compartment heating of the BMW 3 Series E46. First of all, l…
BMW Serie 3
(1998-2006 /
E46)
In order to replace the BMW 3 Series radiator, you need to open the hood to access the engine compartment and locate the radiator, which is located j…
Other guides you may be interested in
|
How to Replace the Front Wing of a Renault Clio
First, remove the wheel where the replacement will occur, then lift the vehicle. This will provide easy access to the clips and bolts securing the wing from the inside. Next, remove the bolts located on the underside of the body and any remaining screws. You can now comfortably extract the entire inner part of the wing. To remove the bumper, follow the instructions in the video. To reassemble the wing, simply retrace the steps in reverse. by ScegliAuto More videos
|
|
For advertising on this site Write to info@scegliauto.com
ScegliAuto is not responsible for any inaccuracy of the data in the lists. To report any inaccuracy or your business (if you own the business in question), please write to info@scegliauto.com
Number of seconds to generate the page: 0.060
(c) ScegliAuto 2026 - info@scegliauto.com - Privacy policy VAT number: IT01247470535 |