
|
Do it yourself
| |||
| ||||


How to Remove the Instrument Cluster from the Dashboard
Model: BMW Serie 3
E46
- Years 1998-2006
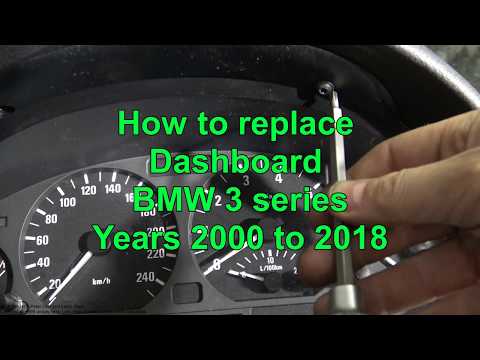
Removing the instrument cluster from the dashboard is a seemingly simple task, but it must be done carefully to avoid damage. Using a screwdriver, remove the screws securing the instrument cluster assembly. With force but also great caution, pull the entire instrument cluster assembly outward, being very careful. Disconnect both rear connections to free the instruments, then remove the instruments. To remove the rear cover, unscrew all the screws; now you can take out the electronic circuit. If the color of the needle indicators has faded, you can refresh it with a permanent marker of the same color. To reassemble, follow the same steps in reverse.
Updated on 5 February 2026 by ScegliAuto
Video tutorial
Related tutorials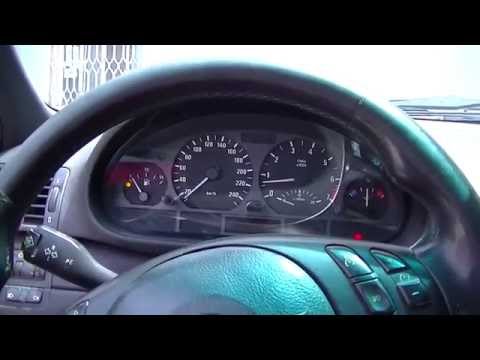
BMW Serie 3
(1998-2006 /
E46)
Are the instrument cluster bulbs damaged? Let's see how to remove the instrument cluster. Remove the instrument cluster mounting screws, pry the inst…

BMW Serie 3
(1998-2006 /
E46)
The following steps will show us how to disassemble and replace the instrument cluster of the BMW 3 Series dashboard. First, we get into the car and …
BMW Serie 3
(1998-2006 /
E46)
Before we can begin, we will have to go and sit in the driver's seat of our BMW 3 Series. Using a Torx screwdriver, let's start by unscrewing the scr…
Other guides you may be interested in
|
Frequently Asked QuestionsHow to Remove the Fuel Pump from the Tank on an Opel Astra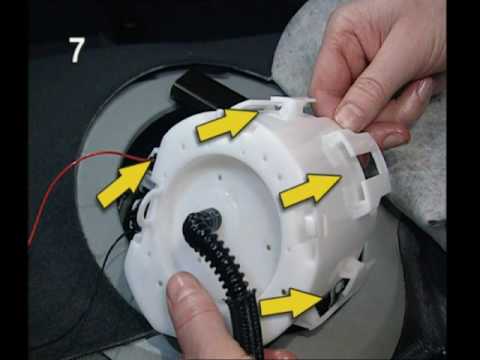
How to remove the fuel pump from the tank on an Opel Astra? First, disconnect the battery cables. Next, remove the rear seat cushions from the car. Use a socket spanner to unscrew the securing screws of the metal cap (located on the metal panel), then remove it from its seat. Use absorbent paper around the perimeter to soak up any liquid leaks. Unscrew the large securing bolt of the fuel pump (if present on the model), disconnect the power connectors and the liquid circulation pipes. Extract the floating fuel pump from its seat along with any attached parts. Finally, refit a new piece. by ScegliAuto More videos
|
|
For advertising on this site Write to info@scegliauto.com
ScegliAuto is not responsible for any inaccuracy of the data in the lists. To report any inaccuracy or your business (if you own the business in question), please write to info@scegliauto.com
Number of seconds to generate the page: 0.060
(c) ScegliAuto 2026 - info@scegliauto.com - Privacy policy VAT number: IT01247470535 |