
|
Do it yourself
| |||
| ||||


Removing/Replacing the Alternator
Model: BMW Serie 5
E39
- Years 1995-2003
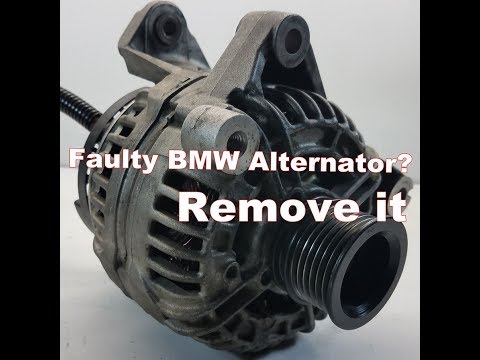
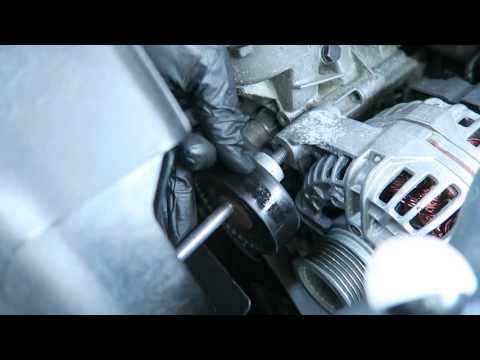
To remove the alternator, proceed as illustrated in the following video. First, to gain better access and more space to extract the alternator, start by removing the air filter housing. Once this is removed, you need to unscrew the power steering fluid reservoir. Remember to disconnect the ground cable, which is the negative terminal from the battery, before proceeding with the removal of the alternator. Also, disconnect the sensor on the intake hose as shown in the video. Now, unscrew the two bolts, one below and the other above, which also includes a pulley as shown in the images. Now that you have extracted the bolts, use a lever to start pulling out the alternator, but do not remove it completely yet. Disconnect the connector at the back by pressing the tab and pulling out the connector. Now, move on to the positive cable (red) that is also bolted at the back with a 13mm nut. When you reinstall the alternator, first connect the electrical cables at the back, then insert it into its seat, slightly rotating it to the right and left while pushing at the same time. Try to align the lower bolt first, then the upper one.
Updated on 9 February 2026 by ScegliAuto
Video tutorial
Related tutorials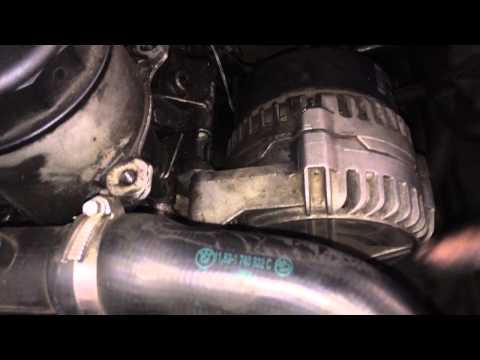
BMW Serie 5
(1995-2003 /
E39)
To remove the alternator, disconnect the negative terminal of the battery, remove the belt, and locate and disconnect each electrical connection, inc…
BMW Serie 5
(1995-2003 /
E39)
To disassemble the alternator, first remove the auxiliary belt by loosening the tensioner. Next, to access the alternator mounting bolts, you need to…
BMW Serie 5
(1995-2003 /
E39)
Do we have the alternator that doesn't charge anymore? Let's see how the alternator is removed from inside the engine compartment of a BMW 5 Series. …
Other guides you may be interested in
|
How to Replace the Front Headlight on a Peugeot 308
As the first operation, you will need to release the bonnet using the designated lever to lift and secure it with the prop rod. This gives you access to the rear of the headlight. Before working in this area, disconnect the battery cables to protect any sensitive circuits. Returning to the back of the headlight, remove the protective cover that shields the connector powering the bulb. Disconnect it and extract the faulty bulb. Retrace the steps described for reassembling the various components. by ScegliAuto More videos
|
|
For advertising on this site Write to info@scegliauto.com
ScegliAuto is not responsible for any inaccuracy of the data in the lists. To report any inaccuracy or your business (if you own the business in question), please write to info@scegliauto.com
Number of seconds to generate the page: 0.119
(c) ScegliAuto 2026 - info@scegliauto.com - Privacy policy VAT number: IT01247470535 |