
|
Do it yourself
| |||
| ||||


How to Navigate the Information Provided by the On-Board Computer
Model: BMW Serie 5
E39
- Years 1995-2003
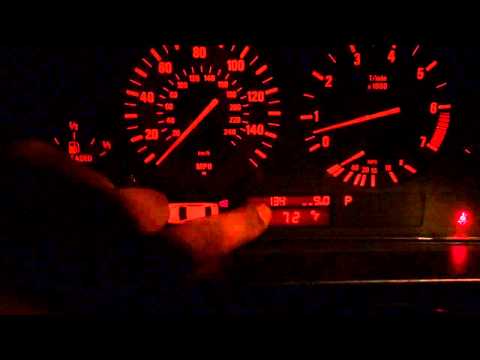
This video illustrates the main functions of the on-board computer along with the information it can provide to the driver. The first function is the outside temperature. Using a specific button located on one of the levers behind the steering wheel, you can change the information displayed on the on-board computer. The second function is the average fuel consumption (measured in miles per gallon in the video). Next, we have the range in miles that the car can travel with the remaining amount of gasoline. We also have the average speed. This data is based on a specific "trip" that can be reset by holding the aforementioned button for about three seconds. To reset the odometer, press the button that protrudes from the glass of the speedometer. Finally, it is worth mentioning the almost obvious function of the computer to count the miles traveled.
Updated on 9 February 2026 by ScegliAuto
Video tutorial
Related tutorials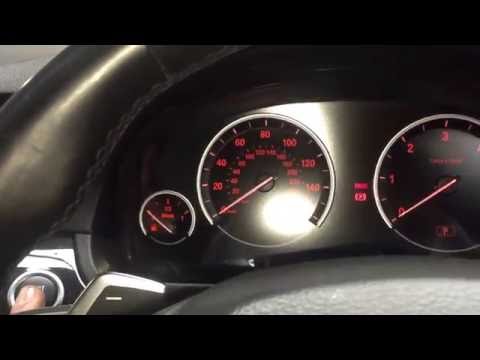
BMW Serie 5
(2010-2017 /
F10, F11)
.. Onboard computers in cars are usually located in front of the dashboard and indicate everything you need,.. …

BMW Serie 5
(2010-2017 /
F10, F11)
.. In this tutorial we can see how to replace the onboard computer display in the BMW 5 Series, an extremely simple and fast operation. First of all, make.. …
BMW Serie 5
(1995-2003 /
E39)
.. Through the onboard computer menu, you can perform diagnostic checks by querying some error codes and evaluating certain.. …
Other guides you may be interested in
|
How to Replace the Wing of the Fiat Punto
First, release the bonnet using the appropriate lever in your vehicle. Then, lift it and secure it with the prop rod. Now, remove the bolts indicated in the video, as well as the screws that secure the inner part of the wing to the bumper, as shown in the video. Additionally, you will need to remove some hidden screws highlighted in the video. Remove the bolts securing the lower part of the wing. After checking and removing all the bolts indicated in the video, you can proceed to extract the part from your vehicle. by ScegliAuto More videos
|
|
For advertising on this site Write to info@scegliauto.com
ScegliAuto is not responsible for any inaccuracy of the data in the lists. To report any inaccuracy or your business (if you own the business in question), please write to info@scegliauto.com
Number of seconds to generate the page: 0.059
(c) ScegliAuto 2026 - info@scegliauto.com - Privacy policy VAT number: IT01247470535 |